Show your custom font on the MSX screen
In the previous article we learned how to extract the default font pattern from an MSX machine to the TinySprite tool so we could change the design and create our own personal fancy pants font, but all this knowledge is useless if we don’t know how to bring that awesome piece of modern art back to our beloved machine, isn’t right?
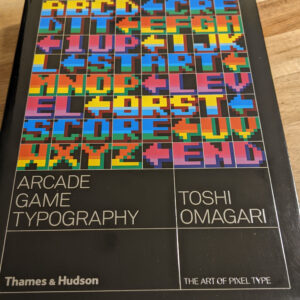
To show this process I wanted to create something nice so it would show how amazing a well-designed font can improve games and programs, so I took the opportunity to use the amazing “Arcade Game Typography” book I had waiting on my bookshelf for quite some time.

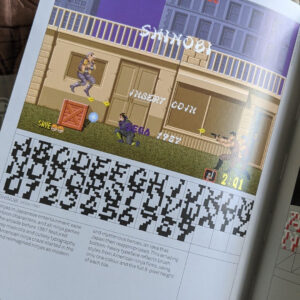
Although we extracted all numbers, uppercase and lowercase characters, and some special symbols, I searched for a special pattern that could make some impact even if it didn’t provide all characters and symbols. The chosen one was from an arcade game that I still love to play but never mastered due to its challenging gameplay: Shinobi

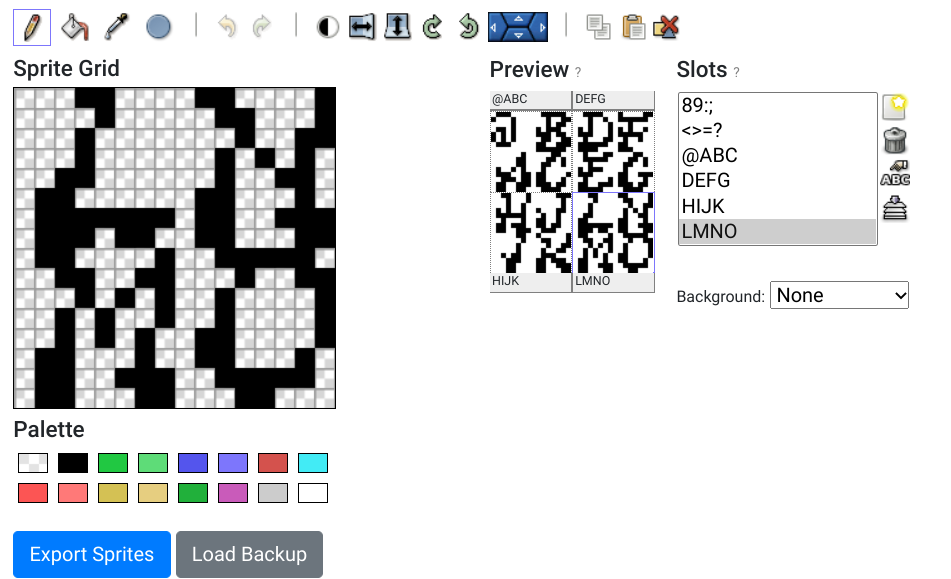
With TinySprite open and the default font loaded, all I had to do was to squint my eyes on the book’s page and try to replicate the pattern at the checkered field from each slot. It just took a couple of hours but the work was kinda relaxing, to be honest! Sadly this typeset only has numbers and uppercase letters, so the lowercase letters and symbols will stay the same.

With the character pattern done and looking impressively not bad at all, all I had to do was to click in “Export Sprites”, select “ASM Hexa” at the “Export as” field and copy the whole thing to the clipboard. I saved the data in a local file just to be sure, and also generated a backup from my work so I could change it further in the future if needed. Maybe I could also change the lowercase letters if I find the courage for that.
We got the data, now we need the program
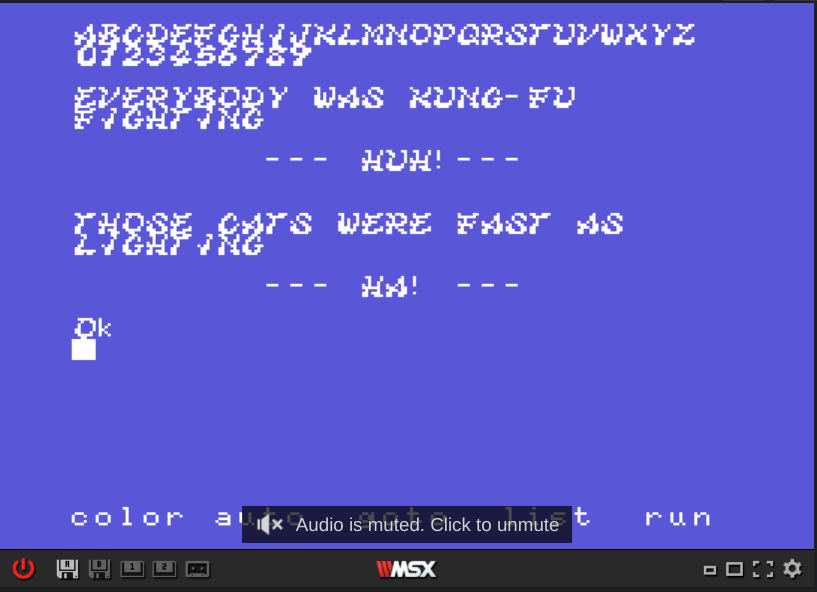
The code to load the pattern data back into the MSX VRAM isn’t complicated at all. I added a routine to print all numbers and uppercase letters so it could show the results after running the program, and also a message just for fun!
CHGMOD: 	equ 0x005f		;Changes the screen mode
LDIRVM: 	equ 0x005C		;Function : Block transfer to VRAM from memory
					;Input    : BC - Block length
           				;			DE - Start address of VRAM
           				;			HL - Start address of memory
CHPUT:  	equ 0x00a2		;Show the content pointed by A on the screen

		org 0xC000		;Alocating the program at the slot 3

start:
		ld a,1			;We load 1 into A
		call CHGMOD		;then call CHGMOD to change to Screen 1
    		ld hl,ninjaFont		;Point HL to the memory position from the font
		ld de,0x8*48		;then loading into DE the destination at VRAM
    		ld bc,8*70		;and in BC the amount of bytes to be copied
		call LDIRVM		;ending with the routine that copies BC bytes
					;from the position HL on the RAM to the
					;position DE on VRAM
					;From this point on the pattern is loaded
					;on the VRAM, and you can use it normally

mainloop:				;Let's set a loop to display the font now
		ld b,26			;loading 26 into B = amount of chars to print
		ld c,65			;and 65 into C =  decimal code of the letter A
		call printChars		;then we call printChars routine
		ld a,"\r"		;We add a "return" code into A
		call CHPUT		;and print it to move the cursor to the
            				;beginnign of the line
		ld a,"\n"		;Next we load a "next line" into A
		call CHPUT		;and print it to move the cursor down
		ld b,10			;Now we can load 10 into B = amount of numbers
		ld c,48			;and 48 into C = decimal code of the number 0
		call printChars		;then we print the numbers from 0 to 9
		ld a,"\r"		;We add a "return" code into A
		call CHPUT		;and print it to move the cursor to the
            				;beginnign of the line
		ld a,"\n"		;Next we load a "next line" into A
		call CHPUT		;and print it to move the cursor down
		ld hl,message		;and we finish by loading our message into HL
		call printMessage	;and call the printMessage to show the text
		ret			;returning to BASIC after that

printChars:
		ld a,c			;We load the position pointed by C into A
		call CHPUT		;and call the routine to show it on the screen
		INC C			;then increment C to the next position
		djnz printChars		;next djnz decreases B and jumps back to
            				;the start of this routine until B = 0
		ret			;which returns the program back to mainloop
printMessage:
		ld a,(hl)		;To print the message we load the content of HL
           				;into A
		cp 0			;We compare A to 0, wich is our EOF
		ret z			;and return to mainloop if the flag Zero raises
		call CHPUT			;otherwise we call CHPUT to print the character
		inc hl			;then we increasing HL to the next position
		jr printMessage		;and repeat the routine until 0 is loaded in A

ninjaFont:				;Copied from the TinySprite export option
        ; --- 0123			;every DB line is referent to one char
        ; color 1			;and the color here doesn't matter
        DB $0E,$19,$31,$31,$31,$33,$3F,$1E	;Number 0
        DB $06,$0E,$3C,$0C,$08,$18,$38,$38	;Number 1
        DB $1C,$36,$22,$06,$0C,$31,$7E,$7C	;Number 2
        DB $1C,$36,$22,$0C,$02,$46,$7C,$38	;Number 3
        ; 					;and so on...
        ; --- 4567
        ; color 1
        DB $0C,$0C,$1A,$12,$64,$7F,$1E,$38
        DB $26,$1F,$10,$3E,$33,$03,$7E,$38
        DB $0E,$18,$30,$3C,$66,$46,$7C,$38
        DB $42,$7F,$33,$04,$0C,$18,$38,$38
        ;
        ; --- 89:;
        ; color 1
        DB $1C,$3F,$26,$18,$24,$66,$7E,$3C
        DB $3C,$67,$67,$3E,$0C,$18,$38,$38
        DB $00,$00,$20,$00,$00,$20,$00,$00
        DB $00,$00,$20,$00,$00,$20,$20,$40
        ;
        ; --- <>=?
        ; color 1
        DB $18,$30,$60,$C0,$60,$30,$18,$00
        DB $00,$00,$F8,$00,$F8,$00,$00,$00
        DB $C0,$60,$30,$18,$30,$60,$C0,$00
        DB $70,$88,$08,$10,$20,$00,$20,$00
        ;
        ; --- @ABC
        ; color 1
        DB $70,$88,$08,$68,$A8,$A8,$70,$00
        DB $02,$06,$06,$4A,$73,$3B,$67,$66
        DB $3E,$13,$16,$5C,$76,$33,$67,$7E
        DB $0C,$1A,$32,$20,$61,$62,$76,$3C
        ;
        ; --- DEFG
        ; color 1
        DB $3C,$12,$11,$51,$71,$23,$7E,$78
        DB $23,$3E,$10,$5C,$70,$21,$67,$7C
        DB $43,$7E,$10,$52,$7C,$24,$60,$70
        DB $0C,$1A,$32,$20,$67,$62,$76,$3C
        ;
        ; --- HIJK
        ; color 1
        DB $31,$11,$12,$52,$7E,$22,$6E,$67
        DB $06,$02,$04,$04,$2C,$1C,$18,$18
        DB $07,$02,$02,$46,$24,$64,$6C,$38
        DB $41,$31,$13,$26,$38,$6E,$67,$63
        ;
        ; --- LMNO
        ; color 1
        DB $18,$08,$10,$10,$30,$60,$7F,$76
        DB $61,$33,$15,$29,$2A,$62,$67,$63
        DB $61,$31,$13,$2A,$26,$62,$67,$63
        DB $3E,$13,$21,$21,$61,$62,$3E,$18
        ;
        ; --- PQRS
        ; color 1
        DB $6E,$33,$11,$51,$72,$3C,$60,$60
        DB $0E,$13,$21,$21,$65,$62,$7F,$39
        DB $6E,$33,$11,$53,$7E,$28,$66,$63
        DB $0E,$13,$11,$4C,$26,$63,$73,$3E
        ;
        ; --- TUVW
        ; color 1
        DB $67,$3E,$10,$10,$30,$60,$60,$60
        DB $63,$31,$11,$21,$21,$62,$7E,$3C
        DB $61,$31,$13,$22,$24,$68,$70,$60
        DB $63,$21,$29,$69,$6B,$7A,$7E,$34
        ;
        ; --- XYZ[
        ; color 1
        DB $31,$11,$0A,$0C,$3C,$76,$67,$63
        DB $31,$11,$1A,$0C,$0C,$18,$18,$18
        DB $33,$1E,$04,$08,$10,$71,$7F,$66
        DB $0E,$08,$08,$08,$08,$08,$0E,$00
        ;
        ; --- \^]_
        ; color 1
        DB $00,$00,$80,$40,$20,$10,$08,$00
        DB $70,$10,$10,$10,$10,$10,$70,$00
        DB $20,$50,$88,$00,$00,$00,$00,$00
        DB $00,$00,$00,$00,$00,$00,$F8,$00
        ;
        ; --- `abc
        ; color 1
        DB $40,$20,$10,$00,$00,$00,$00,$00
        DB $00,$00,$70,$08,$78,$88,$78,$00
        DB $80,$80,$B0,$C8,$88,$C8,$B0,$00
        DB $00,$00,$70,$88,$80,$88,$70,$00
        ;
        ; --- defg
        ; color 1
        DB $08,$08,$68,$98,$88,$98,$68,$00
        DB $00,$00,$70,$88,$F8,$80,$70,$00
        DB $10,$28,$20,$F8,$20,$20,$20,$00
        DB $00,$00,$68,$98,$98,$68,$08,$70
        ;
        ; --- hijk
        ; color 1
        DB $80,$80,$F0,$88,$88,$88,$88,$00
        DB $20,$00,$60,$20,$20,$20,$70,$00
        DB $10,$00,$30,$10,$10,$10,$90,$60
        DB $40,$40,$48,$50,$60,$50,$48,$00
        ;
        ; --- lmno
        ; color 1
        DB $60,$20,$20,$20,$20,$20,$70,$00
        DB $00,$00,$D0,$A8,$A8,$A8,$A8,$00
        DB $00,$00,$B0,$C8,$88,$88,$88,$00
        DB $00,$00,$70,$88,$88,$88,$70,$00
        ;
        ; --- pqrs
        ; color 1
        DB $00,$00,$B0,$C8,$C8,$B0,$80,$80
        DB $00,$00,$68,$98,$98,$68,$08,$08
        DB $00,$00,$B0,$C8,$80,$80,$80,$00
        DB $00,$00,$78,$80,$F0,$08,$F0,$00
        ;
        ; --- tuvw
        ; color 1
        DB $40,$40,$F0,$40,$40,$48,$30,$00
        DB $00,$00,$90,$90,$90,$90,$68,$00
        DB $00,$00,$88,$88,$88,$50,$20,$00
        DB $00,$00,$88,$A8,$A8,$A8,$50,$00
        ;
        ; --- xyz
        ; color 1
        DB $00,$00,$88,$50,$20,$50,$88,$00
        DB $00,$00,$88,$88,$98,$68,$08,$70
        DB $00,$00,$F8,$10,$20,$40,$F8,$00
        DB $00,$00,$00,$00,$00,$00,$00,$00

message:		; Then we set our message here with the \r\n for like break
        db "\nEVERYBODY WAS KUNG-FU \r\nFIGHTING\r\n\n"
        db "\t--- HUH!---\r\n\n"
        db "\nTHOSE CATS WERE FAST AS\r\nLIGHTING\r\n\n"
        db "\t--- HA! ---\r\n\n",0
        end start	; and this ends the code
You can run the program directly on MSXpen site through this link, and removing the mainloop, printchar and printmessage routines will allow you to load the font design on your machine and use the characters in BASIC programs. How cool is that?

Are we done with all this font thing?
Almost! Next article I will show how to set colors for the fonts and any other neat trick I may learn until then. In the meantime have fun with the ninja font!
Related
In the previous article we learned how to extract the default font pattern from an MSX machine to the TinySprite tool so we could change the design and create our own personal fancy pants font, but all this knowledge is useless if we don’t know how to bring that awesome piece of modern art back…