<?xml version="1.0" encoding="utf-8"?><feed xmlns="http://www.w3.org/2005/Atom" ><generator uri="https://jekyllrb.com/" version="4.4.1">Jekyll</generator><link href="www.odbitmachine.net/feed.xml" rel="self" type="application/atom+xml" /><link href="www.odbitmachine.net/" rel="alternate" type="text/html" /><updated>2026-02-03T21:49:03+11:00</updated><id>www.odbitmachine.net/feed.xml</id><title type="html">The Odd Bit Machine</title><subtitle>News for odd bit nerds</subtitle><author><name>Matheus Jose Geraldini dos Santos</name></author><entry><title type="html">The MSX Year in Review - 2025</title><link href="www.odbitmachine.net/2026/01/01/MSX-year-in-review-2025/" rel="alternate" type="text/html" title="The MSX Year in Review - 2025" /><published>2026-01-01T14:57:00+11:00</published><updated>2026-01-01T14:57:00+11:00</updated><id>www.odbitmachine.net/2026/01/01/MSX-year-in-review-2025</id><content type="html" xml:base="www.odbitmachine.net/2026/01/01/MSX-year-in-review-2025/"><![CDATA[<p>The year of 2025 brought a lot of new game developments for the MSX platform, but the information was scatterer throughout so many different medias that was quite really hard to keep up with all of them. That’s why we wil try to list the most important releases and news from the year, and we will try to keep the list updated with any missing pieces.</p>

<p>Some of these developments may become a final product, and some of them are just proof of concepts or lack the license from the original material, but all of them are worth noticing and celebrating, as the community effort seems to still be strong on keeping the platform alive and relevant after more the 40 years. Let’s check them out 😎!</p>

<h2 id="--january">- January</h2>

<h3 id="xegrader-">XeGrader 🇯🇵</h3>

<p>The first game announced early in the year, XeGrader went from a playable demo to complete physical game with months. Developed by the M2 team’s legend Tokihiro Naito, it’s a vertical <a href="https://codeknowledge.livedoor.blog/archives/31168756.html">shumup</a> for the MSX2/2+/Turbo-R machines with lots of secrets and fun gameplay.</p>

<div style="text-align: center;">
<iframe width="420" height="315" src="https://www.youtube.com/embed/zqaI07Y5-3w" frameborder="0" allowfullscreen=""></iframe>
</div>

<h2 id="february">February</h2>

<h3 id="the-rise">The Rise</h3>

<p>With the demo released by the <a href="https://www.youtube.com/@xl2sentertainment790">XL2S Entertainment</a> team, this game left a lof of people wondering if it was indeed running on a stock MSX machine. Let’s hope for more news related to this one soon in 2026.</p>

<div style="text-align: center;">
<iframe width="420" height="315" src="https://www.youtube.com/embed/UeJFRnP0H1A" frameborder="0" allowfullscreen=""></iframe>
</div>

<h2 id="--april">- April</h2>

<h3 id="nightstalker">Nightstalker</h3>

<p>This Castlevania-inspired adventure game comes with an extensive article from <a href="https://www.timeextension.com/news/2025/03/nightstalker-is-castlevania-in-all-but-name-and-we-cant-wait-to-sink-our-teeth-in">TimeExtension</a>, and is being developed for the MSX 2 machines.</p>

<div style="text-align: center;">
<iframe width="420" height="315" src="https://www.youtube.com/embed/7kq25II0oYs" frameborder="0" allowfullscreen=""></iframe>
</div>

<h3 id="mortal-kombat-poc-">Mortal Kombat PoC 🇧🇷</h3>

<p>Another proof of concept for the MSX 2 by the relentless developer Andre Silva, showing that the system could have a pretty nice and playable MK port without additional hardware.</p>

<div style="text-align: center;">
<iframe width="420" height="315" src="https://www.youtube.com/embed/WgLMDR0Lqas" frameborder="0" allowfullscreen=""></iframe>
</div>

<h3 id="msx-wings-">MSX Wings 🇧🇷</h3>

<p>Dubbed as <a href="https://x.com/dantemendes/status/1910278206134898885?s=20">probably just a demo</a> by the brazilian developer Andre Silva, this impressive-looking MSX 2+ game inspired by Sonic Wings has three stages and can be downloaded from his <a href="https://github.com/albs-br/msx-wings/releases/tag/demo">GitHub</a> page.</p>

<div style="text-align: center;">
<iframe width="420" height="315" src="https://www.youtube.com/embed/Afodpqtx0iA" frameborder="0" allowfullscreen=""></iframe>
</div>

<h2 id="--august">- August</h2>

<h3 id="karateka-poc-">Karateka PoC 🇯🇵</h3>

<p>This one really came out of nowhere, and was a huge surprise when unveiled. The MSX BASIC wizard <a href="https://www.youtube.com/@b.p.s.">P.B.S</a> used the power of the R800 processor to recreate Jordan Mechner’s first successful game on the MSX Turbo-R, something that was long overdue. It’s unfortunate that there are no plans to release the game in any form, but it works as a proof that the platform can handle the task of running this masterpiece.</p>

<div style="text-align: center;">
<iframe width="420" height="315" src="https://www.youtube.com/embed/xTx0U9rnVNc" frameborder="0" allowfullscreen=""></iframe>
</div>

<h2 id="--october">- October</h2>

<h3 id="caleb-adventure-">Caleb Adventure 🇧🇷</h3>

<p>Under development by Paulo Gonçalves and his son Caleb in MSX BASIC, and using Amaury Carvalho’s <a href="https://github.com/amaurycarvalho/msxbas2rom">MSXBAS2ROM</a> tool to generate the ROM file, this game is another nice surprise that was promised to be be released in 2026 by the Bitnamic publishing team.</p>

<div style="text-align: center;">
<iframe width="420" height="315" src="https://www.youtube.com/embed/rIptAXt10AM" frameborder="0" allowfullscreen=""></iframe>
</div>

<h3 id="delta">Delta</h3>

<p>There isn’t much information about this one other than this <a href="https://www.reddit.com/r/MSX/comments/1omjfwb/teaser_video_for_delta/">reddit post</a>, but is said that it’s aimed to be release for the MSX 2 on March 2026. The short video is truly enticing.</p>

<div style="text-align: center;">
<iframe width="420" height="315" src="/assets/2026/01/gg3rq3sqyuyf1.mp4" frameborder="0" allowfullscreen=""></iframe>
</div>

<h2 id="--november">- November</h2>

<h3 id="another-world--out-of-this-world-port">Another World / Out of this World port</h3>

<p>Another impressive work developed for the Turbo-R machines with the v9990 video cartridge and support for OPL4 audio, by the team known as <a href="https://www.youtube.com/@cave_fish">Cave Fish</a>. Saying that the results are impressive is an understatement, and better than all it’s that the game is available for download from <a href="https://download.file-hunter.com/">File-Hunter’s</a> website.</p>

<div style="text-align: center;">
<iframe width="420" height="315" src="https://www.youtube.com/embed/kZkBG8rP1RE" frameborder="0" allowfullscreen=""></iframe>
</div>

<h2 id="--december">- December</h2>

<h3 id="yie-ar-kung-fu-poc-">Yie Ar KUNG-FU PoC 🇯🇵</h3>

<p>This proof of concept based on the original Yie Ar Kung-Fu games was made using MSX BASIC by <a href="https://x.com/BasicProgrammer">B.P.S.</a> for the Turbo-R machines, taking advantage of the added processor speed and modern development tools. Might not become a complete game, but fills our eyes with cheer.</p>

<div style="text-align: center;">
<iframe width="420" height="315" src="https://www.youtube.com/embed/6__88vtbOA8" frameborder="0" allowfullscreen=""></iframe>
</div>

<h3 id="ninja-training-">Ninja Training 🇧🇷</h3>

<p>Another complete game released by Mario Cavalcanti of the Clube MSX magazine, Ninja Training is a fast-paced game where you test your reflects to prove that you are worth the title of Ninja. It was sold by the developer during the MSX meeting on the same month, and can be also ordered on the <a href="https://www.clubemsx.com.br/ninja-training-novo-jogo-da-clube-msx-2025/">MSX Clube</a> website when available.</p>

<div style="text-align: center;">
<iframe width="420" height="315" src="https://www.youtube.com/embed/dLvVwRd4q00" frameborder="0" allowfullscreen=""></iframe>
</div>

<h3 id="kanirus-encounter-">Kanirus Encounter 🇧🇷</h3>

<p>The great brazilian developer and <a href="https://www.clubemsx.com.br/">Clube MSX magazine</a> publisher Mario Cavalcanti came with this nice demo for a Christmas-themed shoot-em-up for the MSX 2, where you control one of the Santa’s reindeers and face a huge crab with comic eye-popping reactions when hit. Expect to see this game on a physical cartridge anytime in 2026, as Mario usually releases his games. More details on the Clube MSX <a href="https://www.clubemsx.com.br/kanirus-encounter-demo-jogavel-de-natal-da-clube-msx-para-msx2/">page</a> dedicated for the game.</p>

<div style="text-align: center;">
<iframe width="420" height="315" src="https://www.youtube.com/embed/_SVb2MAIk34" frameborder="0" allowfullscreen=""></iframe>
</div>

<h3 id="yokoxevi-preview-">YOKOXEVI preview 🇯🇵</h3>

<p>On the last minutes of the year, the developer Nobuaki Washio released a video for a reimagined version of the classic Xevious game with a twist: A side-scroller shumup with the same elements and mechanic of the original piece. Nobuaki usually posts a lot of updated on his <a href="https://x.com/Nobuaki_Washio">twitter account</a>, but this update came straight from his <a href="https://www.youtube.com/@NobuakiWashio">youtube channel</a>, so it seems that this may be the best source for follow him at the moment.</p>

<div style="text-align: center;">
<iframe width="420" height="315" src="https://www.youtube.com/embed/hdwEWKrQ094" frameborder="0" allowfullscreen=""></iframe>
</div>

<h2 id="things-to-look-forward-this-year">Things to look forward this year</h2>

<p>While I’m revamping the oddbitmachine.net website and moving from the usual WordPress content management system to a simpler static page system with Jekyll, I’m also planning to write more about the MSX scene and other things. This year I will post more info here than in the other social media services, so stay tuned for news on this channel.</p>

<p>If you have suggestions for missing games released in the year of 2025, please feel free to toss me an <a href="mailto:matheusjgsantos@gmail.com">email</a> and I will check it promptly, since I’m not planning to add comments on this website in the foreseeable future.</p>

<p>Cheers and an excellent 2026 to everyone!</p>]]></content><author><name>Matheus José Geraldini dos Santos</name></author><category term="News" /><category term="MSX Development" /><category term="MSX Games" /><summary type="html"><![CDATA[The year of 2025 brought a lot of new game developments for the MSX platform, but the information was scatterer throughout so many different medias that was quite really hard to keep up with all of them. That’s why we wil try to list the most important releases and news from the year, and we will try to keep the list updated with any missing pieces.]]></summary></entry><entry><title type="html">Let`s make an MSX game - Structure and Organization</title><link href="www.odbitmachine.net/2022/06/16/lets-make-an-msx-game-structure-and-organization/" rel="alternate" type="text/html" title="Let`s make an MSX game - Structure and Organization" /><published>2022-06-16T23:18:00+10:00</published><updated>2022-06-16T23:18:00+10:00</updated><id>www.odbitmachine.net/2022/06/16/lets-make-an-msx-game-structure-and-organization</id><content type="html" xml:base="www.odbitmachine.net/2022/06/16/lets-make-an-msx-game-structure-and-organization/"><![CDATA[<p>A couple of weeks ago we started the game concept design and added some basic code that resulted in our sprite being loaded in the graphic mode screen, which was nice and fun. The problem is that our code looks and feels rushed, with lots of hard-coded memory addresses and repeated commands all over the place. Today we are going to organize the whole thing and ensure that the future additions will always respect a minimal structure standard which will become familiar to us in the next articles and make it easier to maintain the program when any update or fix is required.</p>

<h2 id="we-gotta-be-inclusive-always">We gotta be inclusive, always</h2>

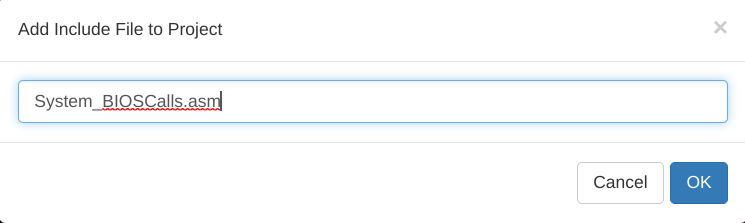
<p>Most of the assembly compilers support the use of the <code class="language-plaintext highlighter-rouge">include</code> statement to add external code into the main program file, and the 8bitworkshop IDE is not different related to this feature. To add an external file to our code we just need to choose where we want to have the statement added to the code, go to the IDE menu, then select File and Add Include File, then enter the file name we want to use, then click in OK. I will create my first included file name <code class="language-plaintext highlighter-rouge">System_BIOSCalls.asm</code> and then move the existing BIOS routines to this new file:</p>

<p><img src="/assets/2022/06/Screenshot-2022-06-16-9.12.27-PM-1.png" alt="" />
Our first include file
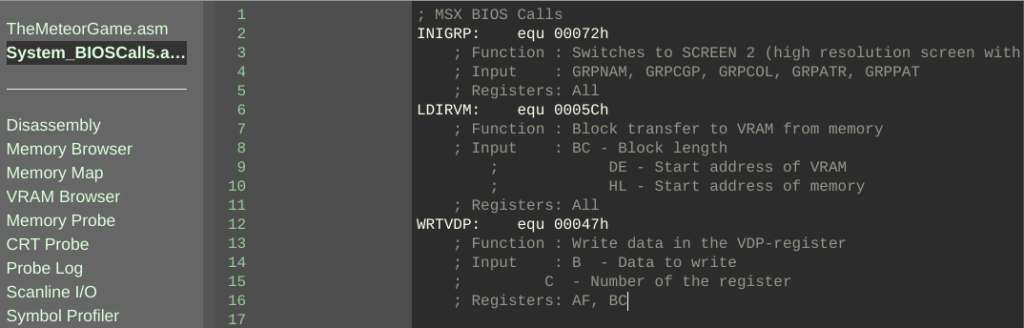
We will notice that the include statement is automatically added to the code, and at the left side menu we will find the new file name showing in the list:</p>

<p><img src="/assets/2022/06/Screenshot-2022-06-16-9.17.38-PM.png" alt="" />
New file and include statement added to the project
Clicking on the file name in the menu will show an empty code window, so now we can cust cut the BIOS routine entries from TheMeteorGame.asm file into this new one:</p>

<p><img src="/assets/2022/06/Screenshot-2022-06-16-9.24.36-PM-1024x328.png" alt="" />
Our BIOS calls have a place of their own now.
Notice that if you leave the code running in the IDE you will get a lot of errors after cutting the code from the main file, but everything is fixed again after pasting the lines in the new file. This is important to observe since we want the code to behave the same way as it was when all code lines were located in the same file.</p>

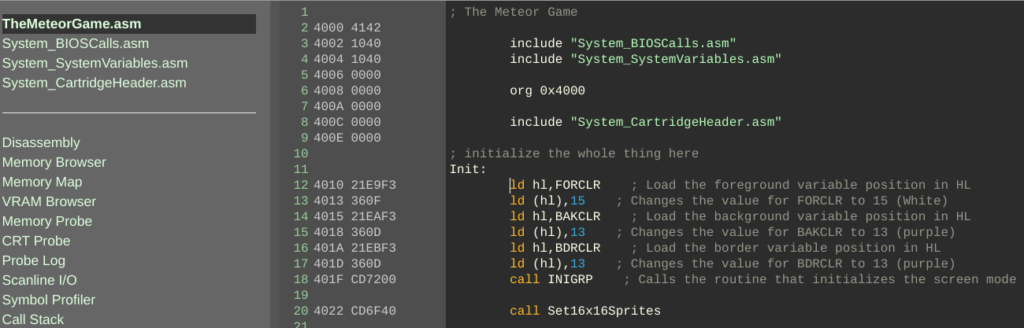
<p>I also took the opportunity and created the <code class="language-plaintext highlighter-rouge">System_SystemVariables.asm</code> file, then moved the variable entries from the main code to this other place, and also the System_CartridgeHeader.asm to remove the cartridge header from the main code and keep things tight. Notice that the org statement still needs to be positioned before the header statement, otherwise the program will not work properly:</p>

<p><img src="/assets/2022/06/Screenshot-2022-06-16-9.39.15-PM-1024x328.png" alt="" />
Looking much better in my opinion!
Remember that crazy Set16x16Sprites routine we added in the last article to make the VDP understand that16x16 pixels is the sprite size we want to use and not the 8x8 size which is the default for the TMS9918, why not also move these lines to another file specific for graphic routines? I created the <code class="language-plaintext highlighter-rouge">Function_SetScreen.asm</code> file to hold any code related to screen settings, then moved the code there.</p>

<h2 id="work-smart-not-hard">Work smart, not hard</h2>

<p>Moving code around is easy but there is a limit to how useful It can be. I’m aiming to have a reusable code and avoid having to repeat the same commands through the program, and a way to achieve this that I found was to use memory addresses as variables, then call the routines after setting the variable values. Too complicated? Let me demonstrate and make it easier to understand.</p>

<p>I will take the lines that change the values of the foreground, background, and border colors and move this whole section to the <code class="language-plaintext highlighter-rouge">Function_SetScreen.asm</code> file, and make it use the registers B,C, and D to set the color values:</p>

<div class="language-plaintext highlighter-rouge"><div class="highlight"><pre class="highlight"><code>; Sets the foreground, background and border colors, calling INITGRP after
InitGraphicMode:
	ld hl,FORCLR		; Loads FORCLR sys variable in HL
        ld (hl),b		; Loads the value from B into the position pointed by HL
        ld hl,BAKCLR		; Loads BAKCLR sys variable in HL
        ld (hl),c		; Loads the value from B into the position pointed by HL
        ld hl,BDRCLR		; Loads BDCLR sys variable in HL
        ld (hl),d		; Loads the value from B into the position pointed by HL
        call INIGRP		; Initializes the VDP graphic mode
        
        ret			; Return to the caller routine
</code></pre></div></div>

<p>Next, we need to replace the code from the main file with the lines below, which loads the registers with the color values desired then calls the routine InitGraphicMode we created in the Function_SetScreen.asm file:</p>

<div class="language-plaintext highlighter-rouge"><div class="highlight"><pre class="highlight"><code>Init:
	;Let's initialize the screen colors
	ld b,15			; Foreground color
        ld c,13			; Background color
        ld d,13			; Border color
        call InitGraphicMode	; Initializes graphic mode with the color at BCD 
</code></pre></div></div>

<p>We basically replaced the 7 lines of code from the original code with a total of 14 lines in the new code which doesn’t seem to be an improvement at all, but keep in mind that we will probably change the colors again in the future during the game development, which will justify this change eventually.</p>

<h2 id="code-is-a-hard-thing-when-things-are-hard-coded">Code is a hard thing when things are hard coded.</h2>

<p>In the previous article, I used the VRAM addresses to load the patterns and attributes of each sprite in the memory. This required some manual calculation to figure out where the next values should be loaded, and also made the code quite inflexible and hard to read and maintain.</p>

<p>Gladly, the MSX BIOS has two routines that calculate the memory address of the sprite based on their ID loaded in A, and return the value in the HL register, making it easy to understand and change the code:</p>

<div class="language-plaintext highlighter-rouge"><div class="highlight"><pre class="highlight"><code>CALPAT:	   equ 00084h	; Function : Returns the address of the sprite pattern table
          		; Input    : A  - Sprite ID
          		; Output   : HL - For the address
          		; Registers: AF, DE, HL
CALATR:    equ: 00087h	; Function : Returns the address of the sprite attribute table
              		; Input    : A  - Sprite number
              		; Output   : HL - For the address
              		; Registers: AF, DE, HL
</code></pre></div></div>

<p>CALPAT will load in HL the VRAM position related to the sprite pattern whose ID is loaded in A before calling the routine, and CALATR will do the same but this time for the sprite’s attributes. Notice that there is a little catch here because the next step is to use LDIRVM to move the pattern and attributes data from RAM to VRAM, but the routine requires that the pattern address is loaded in HL and VRAM address in DE, and CALPAT/CALATR will return the target address in HL!</p>

<div class="language-plaintext highlighter-rouge"><div class="highlight"><pre class="highlight"><code>LDIRVM:    equ 0005Ch	; Function : Block transfer to VRAM from memory
    			; Input    : BC - Block length
    			;            DE - Start address of VRAM
    			;            HL - Start address of memory
</code></pre></div></div>

<p>Since the is no command that loads HL into DE directly, there is a quick way to do this: PUSHing HL content into the stack and then POPing it back in DE. Here is the code snippet that loads the sprite with id 0 into the VRAM:</p>

<div class="language-plaintext highlighter-rouge"><div class="highlight"><pre class="highlight"><code>        ld   a,0		; Load the sprite ID 0 into A
        call CALPAT		; Return the sprite 0 pattern VRAM address in HL 
        push hl			; Send HL data to he stack
        pop  de			; then return it bacl in DE
        LD   bc,64		; Our sprite pattern uses 64 bytes
        LD   hl,MeteorIdleSprite01 ; Load the pattern address in HL
        
        call LDIRVM		; Copy BC blocks of data from RAM HL address into VRAM DE address
        
        ld   a,0		; Load the sprite ID 0 into A
        call CALATR		; Return the sprite 0 attribute VRAM address in HL 
        push hl			; Send HL data to he stack
        pop  de			; then return it bacl in DE
        ld   bc,4		; Our sprite attribute uses 4 bytes
        LD   hl,MeteorIdleSprite01_attrib ; Load the attribute address in HL
        
        call LDIRVM		; Copy BC blocks of data from RAM HL address into VRAM DE address
        
</code></pre></div></div>

<p>To load the next 3 sprites all we need to do is duplicate these code lines replacing the value loaded into A and the labels related to the sprite’s patterns and attributes. Once again this change is not actually reducing the code size nor avoiding code repetition, but it’s easier to understand and maintain, and also makes it easier to improve the routine in the future, which we will do in the next article.</p>

<h2 id="one-final-touch-before-wrapping-up-for-the-day">One final touch before wrapping up for the day</h2>

<p>There is another section of the code that we can move to another file: the sprite patterns and attributes. For that, I’ve created the include file “Asset_MeteorData.asm”, then moved the labels with the hexadecimal values from the main code to this file, which now looks like this:</p>

<div class="language-plaintext highlighter-rouge"><div class="highlight"><pre class="highlight"><code>; The Meteor Game

	include "System_BIOSCalls.asm"
	include "System_SystemVariables.asm"

	org 0x4000
        
	include "System_CartridgeHeader.asm"

; initialize the whole thing here
Init:
	;Let's initialize the screen colors
	ld b,15			; Foreground color
        ld c,13			; Background color
        ld d,13			; Border color
        call InitGraphicMode	; Initializes graphic mode with the color at BCD 
    
        call Set16x16Sprites	; Set the sprite size to 16x16 pixels
        
        ld   a,0		; Load the sprite ID 0 into A
        call CALPAT		; Return the sprite 0 pattern VRAM address in HL 
        push hl			; Send HL data to he stack
        pop  de			; then return it bacl in DE
        LD   bc,64		; Our sprite pattern uses 64 bytes
        LD   hl,MeteorIdleSprite01 ; Load the pattern address in HL
        
        call LDIRVM		; Copy BC blocks of data from RAM HL address into VRAM DE address
        
        ld   a,0		; Load the sprite ID 0 into A
        call CALATR		; Return the sprite 0 attribute VRAM address in HL 
        push hl			; Send HL data to he stack
        pop  de			; then return it bacl in DE
        ld   bc,4		; Our sprite attribute uses 4 bytes
        LD   hl,MeteorIdleSprite01_attrib ; Load the attribute address in HL
        
        call LDIRVM		; Copy BC blocks of data from RAM HL address into VRAM DE address

        ld   a,1		; Load the sprite ID 1 into A
        call CALPAT		; Return the sprite 1 pattern VRAM address in HL 
        push hl			; Send HL data to he stack
        pop  de			; then return it bacl in DE
        LD   bc,64		; Our sprite pattern uses 64 bytes
        LD   hl,MeteorIdleSprite02 ; Load the pattern address in HL
        
        call LDIRVM		; Copy BC blocks of data from RAM HL address into VRAM DE address
        
        ld   a,1		; Load the sprite ID 1 into A
        call CALATR		; Return the sprite 1 attribute VRAM address in HL 
        push hl			; Send HL data to he stack
        pop  de			; then return it bacl in DE
        ld   bc,4		; Our sprite attribute uses 4 bytes
        LD   hl,MeteorIdleSprite02_attrib ; Load the attribute address in HL
        
        call LDIRVM		; Copy BC blocks of data from RAM HL address into VRAM DE address
        ld   a,2		; Load the sprite ID 2 into A
        call CALPAT		; Return the sprite 2 pattern VRAM address in HL 
        push hl			; Send HL data to he stack
        pop  de			; then return it bacl in DE
        LD   bc,64		; Our sprite pattern uses 64 bytes
        LD   hl,MeteorIdleSprite03 ; Load the pattern address in HL
        
        call LDIRVM		; Copy BC blocks of data from RAM HL address into VRAM DE address
        
        ld   a,2		; Load the sprite ID 2 into A
        call CALATR		; Return the sprite 2 attribute VRAM address in HL 
        push hl			; Send HL data to he stack
        pop  de			; then return it bacl in DE
        ld   bc,4		; Our sprite attribute uses 4 bytes
        LD   hl,MeteorIdleSprite03_attrib ; Load the attribute address in HL
        
        call LDIRVM		; Copy BC blocks of data from RAM HL address into VRAM DE address


ForeverLoop:
    jr ForeverLoop    ; Repeats the loop indefinitely
        

	include "Function_SetScreen.asm"        
	include "Asset_MeteorData.asm"
        
        end Init
</code></pre></div></div>

<h2 id="thats-all-for-now">That’s all for now</h2>

<p>We moved and changed quite a lot of our code, and it may be somehow disappointing that in the end there was no improvement in the actual game and we are still seeing the crazy meteor guy stuck at the same position on the screen, but believe me that this was really an excellent improvement done through this article and it will be really helpful in the future. The complete code is available at <a href="https://github.com/oddbitmachine/TheMeteorGame">https://github.com/oddbitmachine/TheMeteorGame</a>, so feel free to check out the progress done so far. We will be back soon to improve the sprite loading routine, so stay tuned!</p>]]></content><author><name>oddbitmachine</name></author><category term="Assembly" /><category term="Making an MSX game" /><category term="MSX Development" /><summary type="html"><![CDATA[A couple of weeks ago we started the game concept design and added some basic code that resulted in our sprite being loaded in the graphic mode screen, which was nice and fun. The problem is that our code looks and feels rushed, with lots of hard-coded memory addresses and repeated commands all over the place. Today we are going to organize the whole thing and ensure that the future additions will always respect a minimal structure standard which will become familiar to us in the next articles and make it easier to maintain the program when any update or fix is required.]]></summary><media:thumbnail xmlns:media="http://search.yahoo.com/mrss/" url="http://www.oddbitmachine.net/wp-content/uploads/2022/06/Screenshot-2022-06-16-11.15.43-PM.png" /><media:content medium="image" url="http://www.oddbitmachine.net/wp-content/uploads/2022/06/Screenshot-2022-06-16-11.15.43-PM.png" xmlns:media="http://search.yahoo.com/mrss/" /></entry><entry><title type="html">Let`s make an MSX game - Game concept</title><link href="www.odbitmachine.net/2022/06/02/lets-make-an-msx-game-game-concept/" rel="alternate" type="text/html" title="Let`s make an MSX game - Game concept" /><published>2022-06-02T22:38:50+10:00</published><updated>2022-06-02T22:38:50+10:00</updated><id>www.odbitmachine.net/2022/06/02/lets-make-an-msx-game-game-concept</id><content type="html" xml:base="www.odbitmachine.net/2022/06/02/lets-make-an-msx-game-game-concept/"><![CDATA[<p>Any game creation should start with a story, a premise, a reason explaining why things are happening, or anything that justifies the events we will witness develop on our screens. It doesn’t need to be a Shakespearean screenplay or even make any sense at all, as long as it can be translated into a playable game.</p>

<p>I tried to imagine a game concept that could be simple to create but at the same time compelling to be played, something like Flappy Bird and Angry Birds (but without birds this time), and also wouldn’t require too much effort to design graphics and assets for it. Since my level of sanity isn’t that high, It didn’t take too long to come up with a crazy idea for a game after all:</p>

<blockquote>
  <p>You are a meteor, travelling nicely though the sideral space without too much to do or anything new to see. Suddenly you feel a little entity from a pale blue planet summoning you , defying your will power, mocking your simply existence, and that just make you really, really mad!</p>
</blockquote>

<p><a href="https://www.storyboardthat.com/storyboards/bb9dd447/come--meteor-"><img src="https://sbt.blob.core.windows.net/storyboards/bb9dd447/come--meteor-.svg" alt="" /></a><br />
<a href="https://www.storyboardthat.com">Made with Storyboard That</a>## The game objective</p>

<p>As a mighty meteor, your objective is to reach the surface of the planet Earth and hit the defiant citizen in the head, just to show these puny humans that no bad deeds should pass without consequences.</p>

<p>But traversing the several layers of Earth’s shield is not an easy task. Usually, a meteor that penetrates the planet’s atmosphere is reduced to very small pieces during the entrance and doesn’t even reach the ground at the end. But you are a smart meteor and you know that passing the layers with care may avoid the shameful fate of becoming space dust, and the dude down there will get away free from your wrath. Unacceptable!</p>

<p>But other bonus perks may make your ultimate sacrifice more delightful: planes, parachutes, and other human-made flying objects can be found on the path to your target, so destroying them will give you that special feeling of vindication, along with some bonus points and even some well-deserved assistance! So hitting everything you find in your way that deserves to be grounded is a must.</p>

<p>So this is the deal: descent from the heavens, avoid burning down by Earth’s protective layers, hit a few bypassers through the way, and finally smash that filthy liar as hard as he deserves.</p>

<h2 id="game-mechanics">Game mechanics</h2>

<p>So here are the rules and constraints the game should be based on:</p>

<ol>
  <li>The game starts with the meteor in outer space, starting to descend into Earth through the <a href="https://earthhow.com/atmosphere-layers-troposphere-stratosphere-mesosphere-thermosphere/">five layers of the planet’s atmosphere</a>:
    <ul>
      <li>Exosphere: This is the starting point in outer space, and there will be no hazardous elements here, We may add some satellites as targets here just for fun.</li>
      <li>Ionosphere: due to the electrified ions existing on this layer, some hazards may affect the meteor somehow.</li>
      <li>Thermosphere: With temperatures reaching up to 1500 degrees celsius, it’s a good idea to slow down the descent through this layer.</li>
      <li>Mesosphere: This is where a meteoroid becomes real meteorites or simply turns into space dust. The player needs to avoid the hazards on this level as much as possible to succeed in the next layer.</li>
      <li>Stratosphere: Human-made flying objects will start to show at this level, but the jet streams can diverge the character’s direction and miss the ultimate target.</li>
      <li>Troposphere: Now it’s time to speed up in the target’s direction before the victim flees from the local. Hitting flying objects may add points or cause hazards to our character, and pollution can also make things more difficult.</li>
      <li>Earth’s crust: hit the target or fail miserably on your mission.</li>
    </ul>
  </li>
  <li>The player needs to control the descent and avoid the hazards during the travel:
    <ul>
      <li>Suffering damage will decrease the meteorite’s size to a point where it turns to dust, losing a life</li>
      <li>Heating up too much can cause the meteorite to melt and lose mass.</li>
      <li>Colling down too fast will cause the meteorite to crack, losing chunks of its body and shrinking in size</li>
      <li>Striking objects through the path can recover some mass of the meteorite along with bonus points</li>
      <li>Missing the target at the end of the descent will decrease the life and reduce the total points obtained.</li>
    </ul>
  </li>
</ol>

<h2 id="a-few-grams-of-inspiration-a-ton-of-perspiration">A few grams of inspiration, a ton of perspiration</h2>

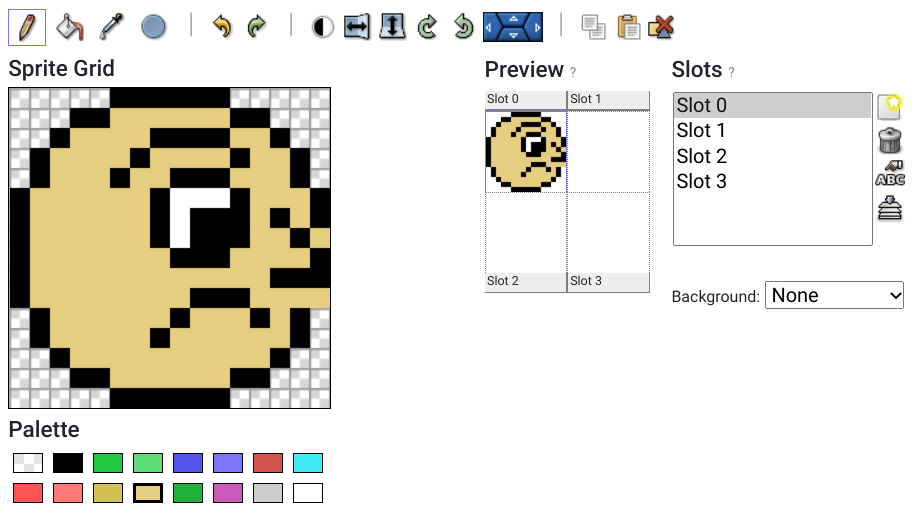
<p>Now that we have a basic concept of what the game will be, let’s do some hard work. As usual, I’m using Jannone’s <a href="http://msx.jannone.org/tinysprite/tinysprite.html">TinySprite</a> to create a mock-up for our deadly meteor character, which will be used as it is for now but might improve in the future.</p>

<p><img src="/assets/2022/06/Screenshot-2022-06-01-10.46.04-PM.png" alt="" />
Our not-so-happy protagonist, looking at his unaware target.</p>

<p>Exporting the sprint as ASM Hexadecimal results in the two sets of sprites below, one for each color:</p>

<div class="language-plaintext highlighter-rouge"><div class="highlight"><pre class="highlight"><code>; --- Slot 0
; color 1
DB $07,$18,$21,$42,$44,$81,$81,$81
DB $80,$80,$80,$40,$41,$20,$18,$07
DB $E0,$18,$E4,$12,$E2,$11,$75,$72
DB $E1,$07,$70,$8A,$02,$04,$18,$E0
; color 11
DB $00,$07,$1E,$3D,$3B,$7E,$7E,$7E
DB $7F,$7F,$7F,$3F,$3E,$1F,$07,$00
DB $00,$E0,$18,$EC,$1C,$0E,$0A,$0D
DB $1E,$F8,$8F,$74,$FC,$F8,$E0,$00
; color 15
DB $00,$00,$00,$00,$00,$00,$00,$00
DB $00,$00,$00,$00,$00,$E0,$80,$80
DB $00,$00,$00,$00,$00,$00,$00,$00
</code></pre></div></div>

<p>We will load the sprites into the VRAM and then position sprite 1 on top of sprite 0, so we can end up with a 2 colors character. Notice that this will consume 50% of the possible sprites per line that the TMS99918 is capable to show, but since the game action will occur from top to bottom the probability of having more than 4 sprites at the same line is minimal in this case. We can also use tiles for the other objects or even try to set the second color as a tile instead of a sprite and figure out how to keep the tiles at the same position as the sprite, and I think that both scenarios could be attempted in the next articles as an exercise for our coding skills.</p>

<h2 id="initial-game-coding-and-structuring">Initial game coding and structuring</h2>

<p>Although I’m not a professional game developer and just an amateur programmer in general, there are some basic coding structures that I would like to apply in this project to make my life easier in the future. Taking advantage of the possibility to add separated files for the program provided by the 8BitWorkshop IDE, I will separate the code into different files depending on the task executed by the routines. Things like BIOS call and System Variables will be added to their respective files, and I will do that slowly during the series of articles so anyone can understand what are the contents of each file and won’t get overwhelmed by facing a huge list of crazy names and memory addresses with no further explanation.</p>

<p>To make things more didactic I will start the game code in a single file, then in the next article, I will show how to transfer the contents to new files keeping the program working and making it easier to visualize the code logic - I hope it so!</p>

<p>Proceeding to the <a href="https://8bitworkshop.com/v3.9.0/?platform=msx">8BitWorkshop</a> IDE, I will create a new project with the game name by selecting “New Project” in the IDE menu. For now, I will call it “The Meteor Game” and then we can come up with a better name like “Come, Meteor!” or something else.</p>

<p><img src="/assets/2022/06/Screenshot-2022-06-01-10.22.53-PM.png" alt="" />&lt;figcaption&gt;This will be the main file for our game code&lt;/figcaption&gt;&lt;/figure&gt;After initiating a new project we will notice that the previous code will still be running in the IDE, and we can reuse some of the available code such as the MSX cartridge header which is required for the MSX to recognize the ROM properly. This is the most basic code to generate a valid ROM file, and although it compiles correctly with some warnings it won’t do anything at all:</p>
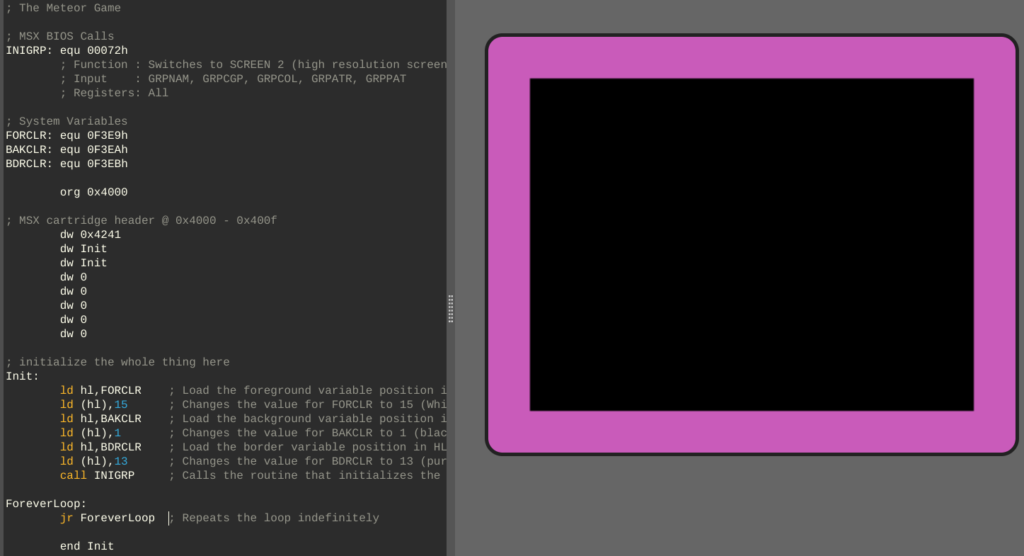
<div class="language-plaintext highlighter-rouge"><div class="highlight"><pre class="highlight"><code>; The Meteor Game

	org 0x4000
        
; MSX cartridge header @ 0x4000 - 0x400f
	dw 0x4241
        dw Init
        dw Init
        dw 0
        dw 0
        dw 0
        dw 0
        dw 0

; initialize the whole thing here
Init:
	ret
	end Init
</code></pre></div></div>

<p>So far all we have is the hexadecimal code for our game protagonist and nothing else, and what I want to do now is to see the little meteor showing on the screen. For this simple task we need to do the following things in our code:</p>

<ol>
  <li>Define the foreground, background, and border colors</li>
  <li>Tell the VDP that we want to use the <a href="https://github.com/gseidler/The-MSX-Red-Book/blob/master/the_msx_red_book.md#graphics_mode">Graphic Mode,</a> also known as Screen 2 in BASIC</li>
  <li>We want to show the meteor as a sprite in the display, so we need to copy it from memory to VRAM</li>
  <li>The character has three different colors, which will require three overlapped sprites.</li>
</ol>

<p>Let’s keep this short list of tasks for now because this will already require some effort.</p>

<h2 id="setting-the-colors-on-the-screen">Setting the colors on the screen</h2>

<p>The MSX <a href="http://map.grauw.nl/resources/msxsystemvars.php">system variables</a> are quite powerful apart from one or other missing things we will notice soon. For setting up the three color variables in our assembly code, we will use the following variables:</p>

<table>
  <thead>
    <tr>
      <th><strong>Variable name</strong></th>
      <th><strong>Memory address</strong></th>
      <th><strong>Size in bytes</strong></th>
      <th><strong>Memory address</strong></th>
    </tr>
  </thead>
  <tbody>
    <tr>
      <td>FORCLR</td>
      <td>#F3E9</td>
      <td>1</td>
      <td>Foreground color</td>
    </tr>
    <tr>
      <td>BAKCLR</td>
      <td>#F3EA</td>
      <td>1</td>
      <td>Background color</td>
    </tr>
    <tr>
      <td>BDRCLR</td>
      <td>#F3EB</td>
      <td>1</td>
      <td>Border color</td>
    </tr>
  </tbody>
</table>

<figcaption>System variables for the screen colors</figcaption>
<p>&lt;/figure&gt;What do all those values mean? The variable name is simply a convention defined for the MSX architecture, so you can use any other name as long you remember in the future what they mean or have enough patience to go through all the code to find out their meaning. The memory address is the location in the system RAM where this information will be stored, so the BIOS calls that reference the values will consult this specific place from the memory to execute whatever it was supposed to.</p>

<p>Now, we need to know how we change the values of any variable in the system. In BASIC, simply adding something like LET FORCLR=15 will set the variable to the value correspondent to the color white, but this is not that simple in assembly, and we need to first load the memory position of the variable into one of the Z80 registers, then load the value into the position pointed by the register. Complex? Not so much:</p>

<p>Let’s first define the variables and their respective memory positions in our code:</p>

<div class="language-plaintext highlighter-rouge"><div class="highlight"><pre class="highlight"><code>;System Variables
FORCLR:	equ 0F3E9h
BAKCLR:	equ 0F3EAh
BDRCLR:	equ 0F3EBh
</code></pre></div></div>

<p>I usually add this section before the origin (org) statement, and after the BIOS calls section. Soon we will move this whole section to a separate file to keep the main code clean.</p>

<p>Next, we need to change the values for the foreground, background, and border to the colors we want to have on the screen. I will use a white foreground (value 15), black background (value 1), and purple border (value 13) for now, so this is how we set the variables in assembly:</p>

<div class="language-plaintext highlighter-rouge"><div class="highlight"><pre class="highlight"><code>; initialize the whole thing here
Init:
	ld hl,FORCLR	; Load the foreground variable position in HL
        ld (hl),15	; Changes the value for FORCLR to 15 (White)
        ld hl,BAKCLR	; Load the background variable position in HL
        ld (hl),1	; Changes the value for BAKCLR to 1 (black)
        ld hl,BDRCLR	; Load the border variable position in HL
        ld (hl),13	; Changes the value for BDRCLR to 13 (purple)
        call INIGRP	; Calls the routine that initializes the screen mode
	
ForeverLoop:
	jr ForeverLoop ; Repeats the loop indefinitely
        
        end Init
</code></pre></div></div>

<p>Notice that we have a new label named “ForeverLoop” and after that a single statement that is a JR (Jump Relative) to the same place, which is a loop with no exit. This is due to the C-BIOS not having a BASIC ROM to return if a program ends with a simple RET, and also because we want to see the results before exiting the code.</p>

<p>This code is nice and all but once again, this program does not do anything at all. Simply setting variables doesn’t result in any change of behavior from the VDP, unless you call the BIOS routine that instructs the VDP to enter in a new (or even the same!) graphic mode.</p>

<h2 id="changing-the-screen-mode-and-setting-the-new-colors">Changing the screen mode and setting the new colors</h2>

<p>We are now going to use one of the <a href="http://map.grauw.nl/resources/msxbios.php">MSX BIOS calls</a> to inform the VDP that we want a new screen mode to be set, along with the color values we defined at the variables. There are some different calls to do the same action, but the one we want at this point is the <strong>INIGRP</strong>:</p>

<div class="language-plaintext highlighter-rouge"><div class="highlight"><pre class="highlight"><code>INIGRP
Address  : #0072
Function : Switches to SCREEN 2 (high resolution screen with 256×192 pixels)
Input    : GRPNAM, GRPCGP, GRPCOL, GRPATR, GRPPAT
Registers: All
</code></pre></div></div>

<p>The INIGRP lives at the address 00072f of the ROM, and has the task to change the screen to graphic mode along with initializing other system variables related to the name, color, and pattern tables, which we will use in the future to know where we can store our graphics in the VRAM without having to calculate every position manually. It’s handy, trust me.</p>

<p>Once again we need to define this label and the address in our code so we can use it in the future. We could just skip that and call the actual memory position, but this would make our code hard to read and understand:</p>

<div class="language-plaintext highlighter-rouge"><div class="highlight"><pre class="highlight"><code>; The Meteor Game

; MSX BIOS Calls
INIGRP:	equ 00072h
	; Function : Switches to SCREEN 2 (high resolution screen with 256×192 pixels)
	; Input    : GRPNAM, GRPCGP, GRPCOL, GRPATR, GRPPAT
	; Registers: All
</code></pre></div></div>

<p>I like to leave the comments with an explanation of what the call does so I can quickly refer to it if I have any doubts about what registers are used and affected. We know now that calling INIGRP will modify all registers, so we cannot trust any value set at them after the call and we need to ensure that we will push to the stack any register value we may need again in the future.</p>

<p>Now our code will finally do something visible: change the screen colors!</p>

<div class="language-plaintext highlighter-rouge"><div class="highlight"><pre class="highlight"><code>; initialize the whole thing here
Init:
	ld hl,FORCLR	; Load the foreground variable position in HL
        ld (hl),15	; Changes the value for FORCLR to 15 (White)
        ld hl,BAKCLR	; Load the background variable position in HL
        ld (hl),1	; Changes the value for BAKCLR to 1 (black)
        ld hl,BDRCLR	; Load the border variable position in HL
        ld (hl),13	; Changes the value for BDRCLR to 13 (purple)
        call INIGRP	; Calls the routine that initializes the screen mode
</code></pre></div></div>

<p>And voila! We still have nothing but in different colors!</p>

<p><img src="/assets/2022/06/Screenshot-2022-06-01-11.43.55-PM-1024x556.png" alt="" />
Givin our meteor a sky to call their own</p>
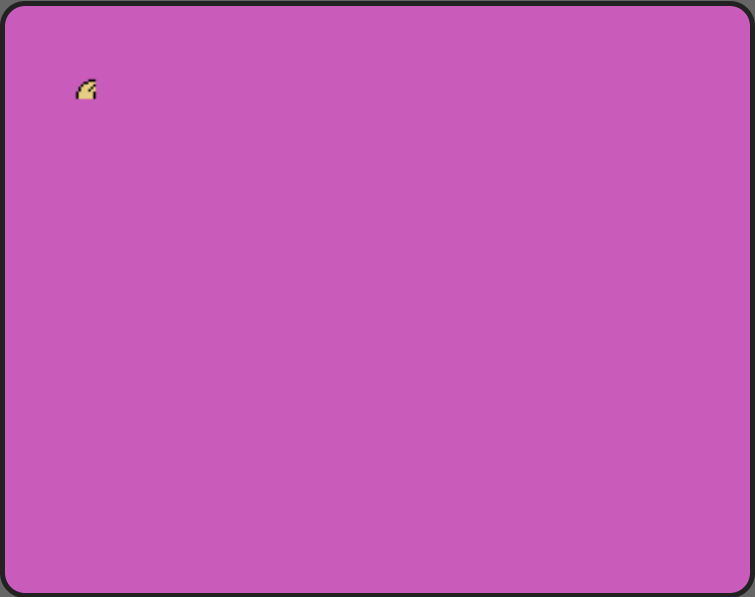
<h2 id="placing-our-meteor-in-the-outer-space">Placing our meteor in the outer space</h2>

<p>It’s now a good time to add the code obtained from TinySprite to our game. I like to add the patterns at the end of the code, but once again they will be changed in the future so it’s just a matter of good visualization for the whole code at the moment:</p>

<div class="language-plaintext highlighter-rouge"><div class="highlight"><pre class="highlight"><code>ForeverLoop:
	jr ForeverLoop	; Repeats the loop indefinitely

MeteorIdleSprite01:
; color 1
        DB $07,$18,$21,$42,$44,$81,$81,$81
        DB $80,$80,$80,$40,$41,$20,$18,$07
        DB $E0,$18,$E4,$12,$E2,$11,$75,$72
        DB $E1,$07,$70,$8A,$02,$04,$18,$E0

MeteorIdleSprite02
; color 11
        DB $00,$07,$1E,$3D,$3B,$7E,$7E,$7E
        DB $7F,$7F,$7F,$3F,$3E,$1F,$07,$00
        DB $00,$E0,$18,$EC,$1C,$0E,$0A,$0D
        DB $1E,$F8,$8F,$74,$FC,$F8,$E0,$00

MeteorIdleSprite03:        
; color 15
        DB $00,$00,$00,$00,$00,$00,$00,$00
        DB $00,$00,$00,$00,$00,$00,$00,$00
        DB $00,$00,$00,$00,$00,$E0,$80,$80
        DB $00,$00,$00,$00,$00,$00,$00,$00

        end Init
</code></pre></div></div>

<p>Setting a sprite on the screen requires three simple steps:</p>

<ol>
  <li>Copy the pattern data from RAM to the VRAM at the position defined by the GRPPAT variable</li>
  <li>Copy the attributes from the RAM to the VRAM at the position defined by the GRPATR variable</li>
  <li>See the sprite showing on the screen as you expected!</li>
</ol>

<p>The values stored by the GRPPAT and GRPATR are the actual positions at the VRAM where the sprites are stored, and the sprite ID is defined by the “slot” where the pattern is allocated. The memory values for each variable are the ones below:</p>

<div class="language-plaintext highlighter-rouge"><div class="highlight"><pre class="highlight"><code>F3C7H GRPNAM: DEFW 1800H   ; Name Table Base
F3C9H GRPCOL: DEFW 2000H   ; Colour Table Base
F3CBH GRPCGP: DEFW 0000H   ; Character Pattern Base
F3CDH GRPATR: DEFW 1B00H   ; Sprite Attribute Base
F3CFH GRPPAT: DEFW 3800H   ; Sprite Pattern Base
</code></pre></div></div>

<p>To better understand the slot x sprite ID thing, consider that sending a pattern data to the VRAM at the address 3800H will result in the sprite with ID 0 being created, then sending another pattern data to the address 3808H will create thee sprite with ID 1, and so on until reaching the limit of 32 sprites that the TMS9918 can handle.</p>

<p>The pattern data used to create a sprite can be set using binary or hexadecimal values, depending on how you created the sprite. For 8x8 pixels sprites, it’s needed to copy 32 bytes of data related to the sprite pattern into the VRAM, and for 16x16 pixels sprites, the value is 64 bytes. As for the attribute values, it’s comprised of just 4 bytes:</p>

<p>-&gt; Vertical position, from zero through 191<br />
 -&gt; Horizontal position, from zero through 251<br />
 -&gt; Sprite number, from zero through 31. There is a caveat here that will be explained later<br />
 -&gt; Foreground and Background colors</p>

<p>So to put our meteor at the top left side of the screen but a few pixels from the border, our attribute data will be something like:</p>

<div class="language-plaintext highlighter-rouge"><div class="highlight"><pre class="highlight"><code>MeteorIdleSprite01_attrib:
	DB $05,$5,$00,$01	; Line 05, column 05, sprite ID 0, 
        			; transparent(0) foreground and black (1) background

MeteorIdleSprite02_attrib:
	DB $05,$05,$04*1,$0B	; Line 05, column 05, sprite ID 1, 
        			; transparent(0) foreground and black (1) background
        
MeteorIdleSprite03_attrib:
	DB $05,$05,$04*2,$0F	; Line 05, column 05, sprite ID 2, 
        			; transparent(0) foreground and black (1) background
</code></pre></div></div>

<p>The caveat mentioned before can be seen here, which is the ID of the sprite being multiplied by 4 in the attribute’s 3rd byte. But why? Remember that by default the sprite size is 8x8 pixels, but we are using 16x16 pixels sprites in this case, and that means the attribute needs to be offset 4 blocks of 8x8 pixels sprites forward to find the next sprite ID. Does this sound overwhelming to wrap your mind around? Just follow the standard of multiplying the ID value by 4 for now and everything will work, but we will simplify the whole thing soon in the next articles.</p>

<p>With both the pattern and attributes loaded into the MSX memory, we can now start to move data between the RAM and VRAM, and for that, we will use the BIOS call named LDIRVM:</p>

<div class="language-plaintext highlighter-rouge"><div class="highlight"><pre class="highlight"><code>LDIRVM
Address  : #005C
Function : Block transfer to VRAM from memory
Input    : BC - Block length
           DE - Start address of VRAM
           HL - Start address of memory
Registers: All
</code></pre></div></div>

<p>This call Loads the data from the RAM address pointed by HL into the VRAM at the address pointed by DE, then Increment both HL and DE and decreases BC, then Repeat the loop until BC reaches 0, effectively copying the data between the RAM and VRAM. Can you guess what the LDIRMV call does?</p>

<p>Now that we know what we need to copy to what position at the VRAM and which command to use for that, why now go ahead and create our first sprite? Consider it done!</p>

<div class="language-plaintext highlighter-rouge"><div class="highlight"><pre class="highlight"><code>        ld de,03800h	; Load in DE the VRAM position for sprite with ID 0
        LD bc,64	; The amount of data to be transferred: 4 x 16 bytes
        LD hl,MeteorIdleSprite01	; Load the MeteorIdleSprite01 pattern in HL
        
        call LDIRVM	; Copy BC amount of bytes of the content pointed by HL into the VRAM at address loaded in DE 
        
        ld de,01B00h	; Load in DE the VRAM position for the attributes
        ld bc,4		; The amount of data to be transferred: 4 bytes
        LD hl,MeteorIdleSprite01_attrib	; Load the MeteorIdleSprite01_attrib attribute in HL
        
        call LDIRVM	; Copy BC amount of bytes of the content pointed by HL into the VRAM at address loaded in DE
        
        ld de,03820h	; Load in DE the VRAM position for sprite with ID 1
        ld BC,64	; The amount of data to be transferred: 4 x 16 bytes
        ld HL,MeteorIdleSprite02	; Load the MeteorIdleSprite02 pattern in HL
        
        call LDIRVM	; Copy BC amount of bytes of the content pointed by HL into the VRAM at address loaded in DE 
        
        ld de,01B04h	; Load in DE the VRAM position for the attributes of the sprite with ID 1
        ld BC,4		; The amount of data to be transferred: 4 bytes
        ld HL,MeteorIdleSprite02_attrib
       
       	call LDIRVM	; Copy BC amount of bytes of the content pointed by HL into the VRAM at address loaded in DE 
        
        ld de,03840h	; Load in DE the VRAM position for sprite with ID 2
        ld BC,64	; The amount of data to be transferred: 4 x 16 bytes
        ld HL,MeteorIdleSprite03	; Load the MeteorIdleSprite03 pattern in HL
        
        call LDIRVM	; Copy BC amount of bytes of the content pointed by HL into the VRAM at address loaded in DE 
        
        ld de,01B08h	; Load in DE the VRAM position for the attributes of the sprite with ID 2
        ld BC,4		; The amount of data to be transferred: 4 bytes
        ld HL,MeteorIdleSprite03_attrib
       
       	call LDIRVM	; Copy BC amount of bytes of the content pointed by HL into the VRAM at address loaded in DE 
        	
ForeverLoop:
	jr ForeverLoop	; Repeats the loop indefinitely
</code></pre></div></div>

<p>Since the Sprite 0 color is black, I changed the BAKCLR value from 1 (black) to 13 (purple) see I could see the sprites correctly, and this was the result of the new code:</p>

<p><img src="/assets/2022/06/image.png" alt="" />
Where is the rest of the meteor?</p>

<p>So what happened here? We can see that the three sprites and attributes are correct, but why can we only see the upper left side of our sprite?</p>

<p>This is because the default behavior of the VDP is to use 8x8 pixels sprites non-magnified. The other possible modes are 8x8 pixels magnified, 16x16 pixels non-magnified and finally 16x16 pixels magnified. Since we want to use 16x16 non-magnified sprites, we need to tell the VDP what we want.</p>

<p>Ok, all we need to do then is to use the BIOS call to change the sprite size, you gonna say. Well, sorry but, unlike the BASIC command <a href="https://www.msx.org/wiki/SCREEN#.3CSpriteSize.3E">Screen</a> which accepts a second parameter to set the size and magnification of the sprite, there is no BIOS call for that. What about a system variable for that? Humm… nope, nothing like that here? So how do we configure this option? By modifying the values of the VDP’s <a href="https://github.com/gseidler/The-MSX-Red-Book/blob/master/the_msx_red_book.md#mode-register-1">register #1</a> to the desired mode.</p>

<p>First, let’s add the BIOS call that modified the VDP register to our list of routines:</p>

<div class="language-plaintext highlighter-rouge"><div class="highlight"><pre class="highlight"><code>WRTVDP:	equ 00047h
	; Function : Write data in the VDP-register
	; Input    : B  - Data to write
	;	     C  - Number of the register
	; Registers: AF, BC
</code></pre></div></div>

<p>We also need to add the System Variable where the values of the VDP’s register #1 can be retrieved:</p>

<div class="language-plaintext highlighter-rouge"><div class="highlight"><pre class="highlight"><code>RG1SAV:	equ 0F3E0h
</code></pre></div></div>

<p>Next, we will add the routine that checks the current value set in the register #1 and modifies only the bits related to sprite size:</p>

<div class="language-plaintext highlighter-rouge"><div class="highlight"><pre class="highlight"><code>Set16x16Sprites:
	ld a,(RG1SAV)	; Load into A the current value of VDP's register 1
        and $FC		; AND A with $FC (11111100) resulting in xxxxxx00 (x=no change)
        or $02		; OR A with 00000010 resulting in xxxxxx10
        di		; Disable interruptions before calling the VDP 
        ld b, a		; Load value from A into B to be used by WRTVDP
	ld c, $01	; Load the register value (#1) into C
	call WRTVDP	; Send to VDP register set at C (#1) the data stored in B
	ei		; Enable interruptions
        ret		; Return to the caller routine
</code></pre></div></div>

<p>Now, all we need to do is to call this routine just after setting the screen mode, and the meteor will appear complete in the purple sky:</p>

<div class="language-plaintext highlighter-rouge"><div class="highlight"><pre class="highlight"><code>Init:
	ld hl,FORCLR	; Load the foreground variable position in HL
        ld (hl),15	; Changes the value for FORCLR to 15 (White)
        ld hl,BAKCLR	; Load the background variable position in HL
        ld (hl),13	; Changes the value for BAKCLR to 13 (purple)
        ld hl,BDRCLR	; Load the border variable position in HL
        ld (hl),13	; Changes the value for BDRCLR to 13 (purple)
        call INIGRP	; Calls the routine that initializes the screen mode
	
        call Set16x16Sprites
</code></pre></div></div>

<p>Now it’s much better!</p>

<p><img src="/assets/2022/06/image-1.png" alt="" />
Look, there is our little friend ready for action!</p>
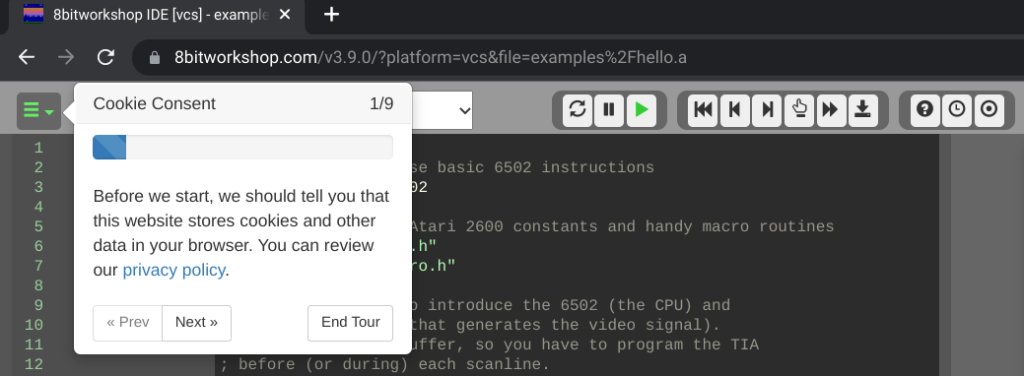
<h2 id="the-code-so-far">The code so far</h2>

<p>Here is the complete code that we just created to show our protagonist on the screen:</p>

<div class="language-plaintext highlighter-rouge"><div class="highlight"><pre class="highlight"><code>; The Meteor Game

; MSX BIOS Calls
INIGRP:	equ 00072h
	; Function : Switches to SCREEN 2 (high resolution screen with 256×192 pixels)
	; Input    : GRPNAM, GRPCGP, GRPCOL, GRPATR, GRPPAT
	; Registers: All
LDIRVM:	equ 0005Ch
	; Function : Block transfer to VRAM from memory
	; Input    : BC - Block length
        ;            DE - Start address of VRAM
        ;            HL - Start address of memory
	; Registers: All
WRTVDP:	equ 00047h
	; Function : Write data in the VDP-register
	; Input    : B  - Data to write
	;	     C  - Number of the register
	; Registers: AF, BC

; System Variables
FORCLR:	equ 0F3E9h
BAKCLR:	equ 0F3EAh
BDRCLR:	equ 0F3EBh
GRPATR:	equ 0F3CDh
GRPPAT:	equ 0F3CFh
RG0SAV:	equ 0F3DFh
RG1SAV:	equ 0F3E0h

	org 0x4000
        
; MSX cartridge header @ 0x4000 - 0x400f
	dw 0x4241
        dw Init
        dw Init
        dw 0
        dw 0
        dw 0
        dw 0
        dw 0

; initialize the whole thing here
Init:
	ld hl,FORCLR	; Load the foreground variable position in HL
        ld (hl),15	; Changes the value for FORCLR to 15 (White)
        ld hl,BAKCLR	; Load the background variable position in HL
        ld (hl),13	; Changes the value for BAKCLR to 13 (purple)
        ld hl,BDRCLR	; Load the border variable position in HL
        ld (hl),13	; Changes the value for BDRCLR to 13 (purple)
        call INIGRP	; Calls the routine that initializes the screen mode
	
        call Set16x16Sprites
        
        ld de,03800h	; Load in DE the VRAM position for sprite with ID 0
        LD bc,64	; The amount of data to be transferred: 4 x 16 bytes
        LD hl,MeteorIdleSprite01	; Load the MeteorIdleSprite01 pattern in HL
        
        call LDIRVM	; Copy BC amount of bytes of the content pointed by HL into the VRAM at address loaded in DE 
        
        ld de,01B00h	; Load in DE the VRAM position for the attributes
        ld bc,4		; The amount of data to be transferred: 4 bytes
        LD hl,MeteorIdleSprite01_attrib	; Load the MeteorIdleSprite01_attrib attribute in HL
        
        call LDIRVM
        
        ld de,03820h
        ld BC,64
        ld HL,MeteorIdleSprite02
        
        call LDIRVM
        
        ld de,01B04h
        ld BC,4
        ld HL,MeteorIdleSprite02_attrib
       
       	call LDIRVM
        
        ld de,03840h
        ld BC,64
        ld HL,MeteorIdleSprite03
        
        call LDIRVM
        
        ld de,01B08h
        ld BC,4
        ld HL,MeteorIdleSprite03_attrib
       
       	call LDIRVM
        	
ForeverLoop:
	jr ForeverLoop	; Repeats the loop indefinitely
        
Set16x16Sprites:
	ld a,(RG1SAV)	; Load into A the current value of VDP's register 1
        and $FC		; AND A with $FC (11111100) resulting in xxxxxx00 (x=no change)
        or $02		; OR A with 00000010 resulting in xxxxxx10
        di		; Disable interruptions before calling the VDP 
        ld b, a		; Load value from A into B to be used by WRTVDP
	ld c, $01	; Load the register value (#1) into C
	call WRTVDP	; Send to VDP register set at C (#1) the data stored in B
	ei		; Enable interruptions
        ret		; Return to the caller routine
        

MeteorIdleSprite01:
; color 1
        DB $07,$18,$21,$42,$44,$81,$81,$81
        DB $80,$80,$80,$40,$41,$20,$18,$07
        DB $E0,$18,$E4,$12,$E2,$11,$75,$72
        DB $E1,$07,$70,$8A,$02,$04,$18,$E0

MeteorIdleSprite01_attrib:
	DB $05,$5,$00,$01	; Line 05, column 05, sprite ID 0, 
        			; transparent(0) foreground and black (1) background

MeteorIdleSprite02
; color 11
        DB $00,$07,$1E,$3D,$3B,$7E,$7E,$7E
        DB $7F,$7F,$7F,$3F,$3E,$1F,$07,$00
        DB $00,$E0,$18,$EC,$1C,$0E,$0A,$0D
        DB $1E,$F8,$8F,$74,$FC,$F8,$E0,$00

MeteorIdleSprite02_attrib:
	DB $05,$05,$04*1,$0B	; Line 05, column 05, sprite ID 1 (4*1), 
        			; transparent(0) foreground and black (1) background


MeteorIdleSprite03:        
; color 15
        DB $00,$00,$00,$00,$00,$00,$00,$00
        DB $00,$00,$00,$00,$00,$00,$00,$00
        DB $00,$00,$00,$00,$00,$E0,$80,$80
        DB $00,$00,$00,$00,$00,$00,$00,$00
        
MeteorIdleSprite03_attrib:
	DB $05,$05,$04*2,$0F	; Line 05, column 05, sprite ID 2 ($4*2), 
        			; transparent(0) foreground and black (1) background

        
        end Init
</code></pre></div></div>

<p>As I mentioned before, this code is already long enough to make it hard to read, so in the next article, we will move things from the main file to other places, create some methods to allow less hardcoded values making the code more flexible, and add a call that returns the VRAM address of each sprite based on its ID, releasing us from needing to calculate each hexadecimal value manually.</p>

<p>If you like to see how the project looks after being published on GitHub, just check my repo <a href="https://github.com/oddbitmachine/TheMeteorGame">TheMeteorGame</a>.</p>

<p>We will be back soon, so stay tuned!</p>]]></content><author><name>oddbitmachine</name></author><category term="Assembly" /><category term="Making an MSX game" /><category term="MSX Development" /><summary type="html"><![CDATA[Any game creation should start with a story, a premise, a reason explaining why things are happening, or anything that justifies the events we will witness develop on our screens. It doesn’t need to be a Shakespearean screenplay or even make any sense at all, as long as it can be translated into a playable game.]]></summary><media:thumbnail xmlns:media="http://search.yahoo.com/mrss/" url="http://www.oddbitmachine.net/wp-content/uploads/2022/05/Screenshot-2022-05-30-10.12.47-PM.png" /><media:content medium="image" url="http://www.oddbitmachine.net/wp-content/uploads/2022/05/Screenshot-2022-05-30-10.12.47-PM.png" xmlns:media="http://search.yahoo.com/mrss/" /></entry><entry><title type="html">Let`s make an MSX game - Starting now!</title><link href="www.odbitmachine.net/2022/05/26/lets-make-an-msx-game-starting-now/" rel="alternate" type="text/html" title="Let`s make an MSX game - Starting now!" /><published>2022-05-26T22:47:59+10:00</published><updated>2022-05-26T22:47:59+10:00</updated><id>www.odbitmachine.net/2022/05/26/lets-make-an-msx-game-starting-now</id><content type="html" xml:base="www.odbitmachine.net/2022/05/26/lets-make-an-msx-game-starting-now/"><![CDATA[<p>After studying, reading, and playing a lot with assembly code on the MSX, I finally decided to start to develop a proper game.</p>

<p>As Voltaire once said - “Perfect is the enemy of good”, and trying to achieve the best knowledge possible about the subject would end in a quest that could take years and I really want to have something to deliver now, so we will have to start with what we have now and improve as we proceed.</p>

<p>Please keep in mind that so far we have 0 games developed and published, so this will be a learning quest for both the writers and the readers of the article series. The upside is that we are going to talk the language at the same levels as anyone with zero knowledge of game development, but also means that we may talk a lot of bullcrap and use inefficient methods of designing, coding, asset creation, and any other aspect involved in the gaming development. We probably will need to add a professional developer in the process but at the same time, we want to keep the content available for free which may prevent this from happening soon. Let’s keep watching the outcome of the articles in the next months and come back to this subject in the future if needed.</p>

<p>This means that we will try to create these articles with the intention to provide the best and most didactic way to help anyone looking to create a game on the MSX today. In the future we will evolve the knowledge and include the MSX 2 and 2+ platforms as well, then at the end, we might also include other similar platforms in the process such as the ZX Spectrum, Amstrad, and others.</p>

<h3 id="our-goals-and-constraints">Our goals and constraints</h3>

<p>During the last months, we studied several compilers, tools, libraries, and example codes to figure out what would be the most convenient way to create a game for the MSX for anyone interested in the subject.</p>

<p>Since not everyone may have a real MSX machine with all the modern hardware and basic peripherals to start coding without too much struggle, we simply avoided using this option. A good development environment would require at least a full working disk driver, an assembly program in a ROM or running in a mapper or MegaRAM cartridge, and possibly an SD interface or even some unobtanium parts for regular people such as the GR8NET. For game dev beginners, this could be too costly and hard to justify the investment.</p>

<p>We are also avoiding tools that require any specific operating system for now. There are some excellent compilers, tools, and IDEs out there which aren’t available to all platforms and are sometimes not updated to the latest operating system versions, and installing and maintaining the environment up and running could require too much effort which we could use for learning and creating things with the assembly language, so at this moment we are avoiding anything that involves any kind of installation.</p>

<p>So what was left for us? Any web-based online tools and there are enough of these to start the learning process and at least generate a complete 32Kb game ROM, which is our initial goal for this article series. We also want to keep the cost as low as possible, so free and open tools are our preferred ones until it becomes unavoidable, which might happen sometime in the future. As a bonus, we may identify missing opportunities to develop new tools and address that during the process, which means that if there isn’t a tool available for a specific task we can create it. This may sound like an aggressive goal, but with time and patience, we might get there eventually.</p>

<h3 id="selecting-and-sharpening-the-tools">Selecting and sharpening the tools</h3>

<p>So far we ran our code at the <a href="https://msxpen.com/">MSXPen</a> online tool a lot, since it’s really easy to use, provides a fast emulation with several machines and hardware add-ons, and simply works. But as we used the tool we started to notice a few things that could avoid us from meeting the goals presented before:</p>

<ul>
  <li>All programs are compiled as a BIN file that can be run from the virtual disk, and there is no option available to generate ROM files at the moment.</li>
  <li>The code will vanish as soon as you reload the page or close the browser. There is an option to share the code so we can save the link it creates to open the code again in the future, but this may not be something future-proof and not the best way to back up our work</li>
  <li>The Inspector tool is useful to see the values for each of the Z80 registers during the code execution, but that’s all it does. No memory map, no option to pause the code, or any other advanced tool.</li>
  <li>Navigating the code becomes really complicated as the size increases, and finding sections and commands can be quite time-consuming and annoying.</li>
</ul>

<p>Don’t get me wrong, I’m not trying to diss the tool here, especially because I’m a huge fan of this app, and I will keep using it as a testing ground for the created programs as we will see in the future.</p>

<p>So what can we use in place of MSXPen? I chose the 8bitworkshop online tool <a href="https://8bitworkshop.com/v3.9.0/">8BitShop IDE</a> for the task.</p>

<h3 id="the-8bitshop-ide-whats-that-about">The 8BitShop IDE: what’s that about?</h3>

<p>The 8BitShop IDE is the creation of Steven Hugg, who among other incredible things also published <a href="https://8bitworkshop.com/docs/books/index.html">a few books</a> about game development for different platforms using his own tool, has a <a href="https://twitter.com/8bitworkshop">Twitter account</a> where we can follow the latest news, and also provided the entire code of the tool on <a href="https://github.com/sehugg/8bitworkshop">GitHub</a> in case anyone wants to help improve the app or run it locally. They also accept donations through <a href="https://www.patreon.com/8bitworkshop">Patreon</a> and <a href="https://www.paypal.com/donate?hosted_button_id=EUD253647QZQS">Paypal</a>, so don’t forget to send him a “thank you” in form of monetary values in case your game becomes a multimillion dollars success!</p>

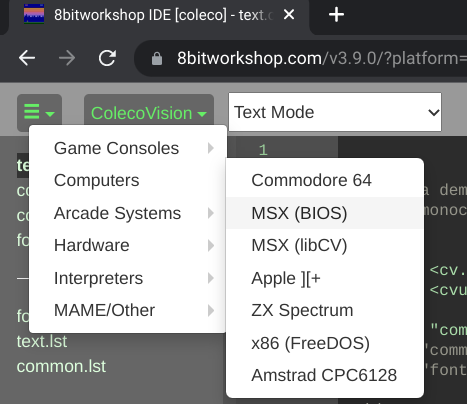
<p>Accessing the <a href="https://8bitworkshop.com/v3.9.0/">site</a> for the first time will take us to the Atari development section and a short tour through the main sections of the IDE, which we will take about with mode details ahead.</p>

<p><img src="/assets/2022/05/Screenshot-2022-05-26-8.47.27-PM-1024x376.png" alt="" />&lt;figcaption&gt;Take a short tour through the 8BitShop IDE&lt;
The amount of available platforms is outstanding, but for now, we are focusing on the MSX computer using the BIOS option.</p>
<p>It’s important to notice that the system emulator doesn’t provide any commercial MSX ROM, and uses the <a href="http://cbios.sourceforge.net/">C-BIOS</a> in order to avoid copyright issues with the owners of the property. There is also the option to use the <a href="https://github.com/sehugg/cvlibc">LibCV/LibCU</a> library which allows development using C with minimal BIOS interaction, but no option for using DOS or Disk Basic environments so far.</p>

<p><img src="http://www.oddbitmachine.net/wp-content/uploads/2022/05/Screenshot-2022-05-26-8.54.00-PM.png" alt="" />
<img src="/assets/2022/05/Screenshot-2022-05-26-9.13.44-PM.png" alt="" />
After selecting MSX (BIOS) as the desired environment, the “Hello World” program will be automatically loaded into the IDE.</p>
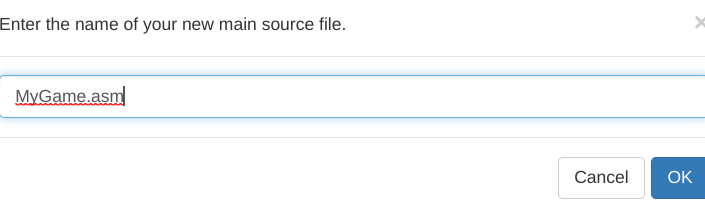
<p>From the top-left menu, also known as the “<a href="https://uxplanet.org/choose-correct-menu-icon-for-your-navigation-7ffc22df80ac">hamburger menu</a>”, we can select the “New Project” option to start our work. It’s important to follow a standard for the file names so we don’t create a confusing structure and make the whole development process a complete mess (been there, done that).</p>

<p>We will suggest a naming standard during the series that could make the code work easier. Since we will start from scratch here, in the end, everyone will be familiar with the content of each file.</p>

<p><img src="/assets/2022/05/Screenshot-2022-05-26-9.15.22-PM-edited.png" alt="" />
MyGame.asm looks like a good name, but will it sell?
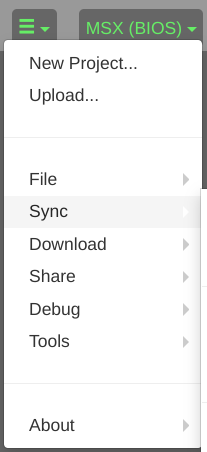
Other options from the menu that are noteworthy are the “File”, where is possible to add, rename and delete files in the project; the “Download” which allows transferring the project as a source file, ROM image, or the complete project as a ZIP; and also the “Share” option to create a video or even a playable link from the project.</p>
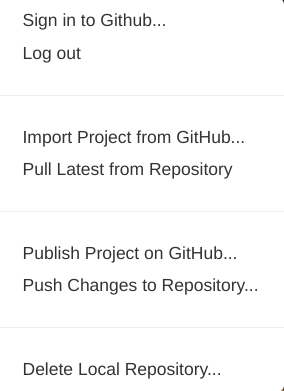
<p>But the most interesting option to me is the “Sync” option, which opens the possibility to pull and push the code to Github.</p>

<p>During the articles we will use Github as much as possible so we can at the same time protect our work, observe the evolution of the code and also return to previous versions in case we break something, which we will probably do a lot.</p>

<p>If you don’t have an account on Github, now it’s a good time to <a href="https://docs.github.com/en/get-started/signing-up-for-github/signing-up-for-a-new-github-account">create one</a>, and it’s free! After creating the account or just logging in on an existing one, we only need to click on “Sign in to Github…” and follow any instructions provided in the new window, and the services will be connected.</p>

<p><img src="/assets/2022/05/Screenshot-2022-05-26-10.15.45-PM.png" alt="" />
The first thing you will want to do next is to use the “Publish Project on Github…”, and for that, there are some things we need to define in this step. If you don’t want to allow public access to your code then it’s necessary to change the repository type to “Private”, and the type of license is a personal choice so we won’t touch on this subject here.</p>
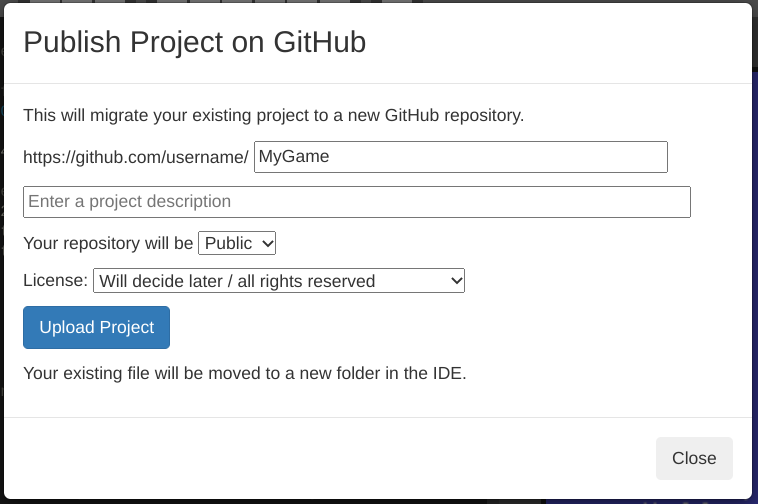
<p><img src="/assets/2022/05/Screenshot-2022-05-26-10.26.27-PM.png" alt="" />
Publishing the project on Github
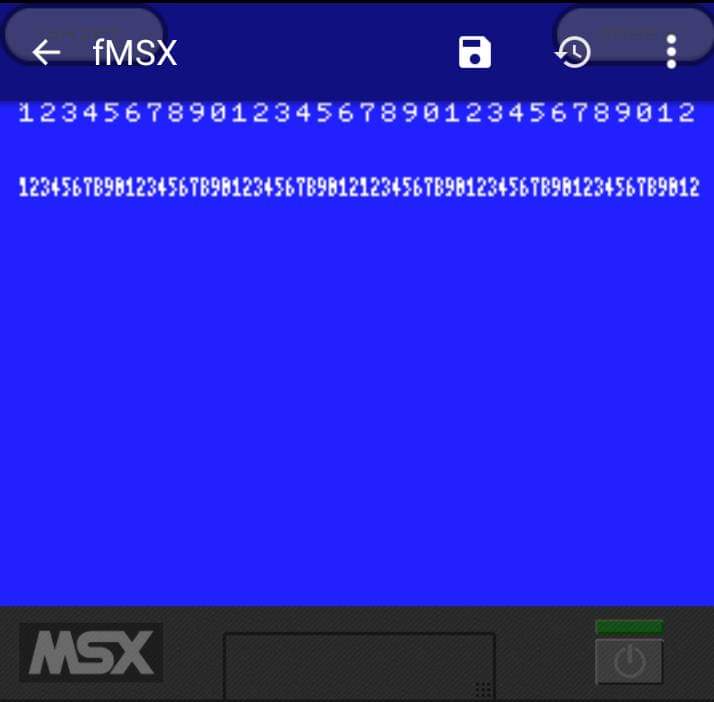
Another advantage of having the code published on Github is that you can use another IDE to keep developing the code such as <a href="https://code.visualstudio.com/">VSCode</a> locally, synchronize your local code with the remote repository then pull the updated code from the repo to the 8BitShop IDE for tests. If you have another person working on the code or even a complete team, then the Github repository is more than required.</p>
<h3 id="every-journey-starts-with-a-first-step">Every journey starts with a first step</h3>

<p>Now that we have our initial encounter with the web IDE tool and also learned a little about it and its possibilities, we can consider as started our gaming development quest. Next article we will jump straight to the assembly code and discuss more of the 8BitShop IDE and Github functionalities, as well as the other online tools we will use during the process. I hope you are as excited about this journey as we are, and we invite you to provide your feedback and suggestions whenever you feel like it.</p>]]></content><author><name>oddbitmachine</name></author><category term="Assembly" /><category term="Making an MSX game" /><category term="MSX Development" /><summary type="html"><![CDATA[After studying, reading, and playing a lot with assembly code on the MSX, I finally decided to start to develop a proper game.]]></summary><media:thumbnail xmlns:media="http://search.yahoo.com/mrss/" url="http://www.oddbitmachine.net/wp-content/uploads/2022/05/Screenshot-2022-05-26-8.17.38-PM.png" /><media:content medium="image" url="http://www.oddbitmachine.net/wp-content/uploads/2022/05/Screenshot-2022-05-26-8.17.38-PM.png" xmlns:media="http://search.yahoo.com/mrss/" /></entry><entry><title type="html">The magic 4x8 font generator</title><link href="www.odbitmachine.net/2022/02/24/the-magic-4x8-font-generator/" rel="alternate" type="text/html" title="The magic 4x8 font generator" /><published>2022-02-24T20:33:33+11:00</published><updated>2022-02-24T20:33:33+11:00</updated><id>www.odbitmachine.net/2022/02/24/the-magic-4x8-font-generator</id><content type="html" xml:base="www.odbitmachine.net/2022/02/24/the-magic-4x8-font-generator/"><![CDATA[<p>Some time ago Breno Motta, who is one of the members of Facebook’s MSX Brasil Oficial group published a picture of a short BASIC program that creates a “compressed” font style with 4 x 8 pixels on Screen 2 based on the text showing on the screen. It was really interesting to see how the program was able to create a really perfectly readable font with such a small footprint, and I got really curious in learning more about how it worked, and I found out that it is really simple but also very clever!</p>

<h2 id="about-brenos-code">About Breno’s code</h2>

<p>This is the picture Breno Motta published in the Facebook group on January’s 1st 2022:</p>

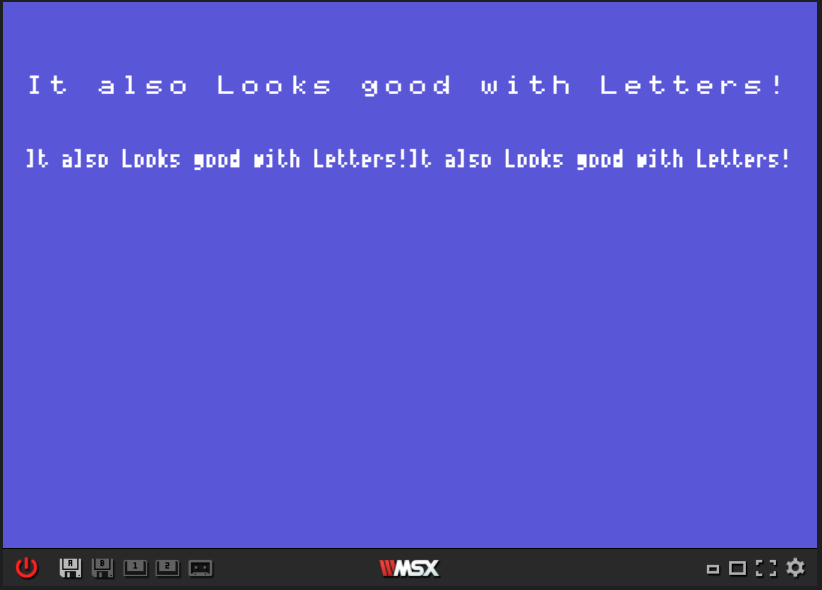
<p><img src="/assets/2022/02/Breno-Motta-4x8-font-generator.jpg" alt="" />&lt;figcaption&gt;By Breno Motta&lt;/figcaption&gt;&lt;/figure&gt;&lt;/div&gt;He also posted a picture from the BASIC code which I typed on <a href="https://msxpen.com/codes/-MwJeNlnZ7R9Ql8JT1XS">MSXPen</a> and am also providing below:</p>
<div class="language-plaintext highlighter-rouge"><div class="highlight"><pre class="highlight"><code>1 color 15,4,4
2 screen 2
3 open "grp:" for output as #1
4 preset(0,20),15
5 print #1,"12345678901234567890123456789012"
6 for g = 0 to 7
7 for f = 0 to 255
8 a = point(f,g+20)
9 if a = 15 then pset(f*.5,g+48),a
10 if a = 15 then pset(128+f*.5,g+48),a
11 next f,g
12 goto 12
</code></pre></div></div>

<p>So how this code works? We start by changing the screen colors and screen mode in the first 2 lines. Next in line 3, we use the <a href="https://www.msx.org/wiki/OPEN">OPEN</a> command to create an output file identified as #1, which is the “channel” we use to print characters in Screen 2 since it doesn’t support using PRINT directly.</p>

<p>Line 4 will use the <a href="https://www.msx.org/wiki/PRESET">PRESET</a> command to basically position the cursor at position X = 0 and Y = 20, which in text mode could be done using the <a href="https://www.msx.org/wiki/LOCATE">LOCATE</a> command. Notice that a white pixel will be set on this position of the screen since we are also stating the color 15 in the code, but if we omit this value the pixel will not show on the screen with no change in how the code works.</p>

<p>Just a side note here: the difference between PSET and PRESET is that the first command will set a pixel in the screen using the color defined for the foreground and the second will set the pixel using the background color if no value is provided as the color parameter, so they basically SET and RESET the pixel color.</p>

<p>Line 5 will print the string that will be used during the “compression” process at the position previously used by the PRESET command. It’s important to notice that there is a special reason for this location in the next steps. Then we create two nested loops with G and F, so we can iterate G from 0 through 7 and F from 0 through 255. Both variables will be used to read the string and “print the pixels” of the compressed font as we will see further.</p>

<p>Now line 8 is an interesting one. We will use the command <a href="https://www.msx.org/wiki/LOCATE">POINT</a> to read the color from the pixel at the position X by Y, which means that we are basically reading the text printed on the screen and writing down the status of each of the pixels based on if they are lit or not. Clever, ain’t? Using F for the X position (column) and G+20 for the Y (row) the code will read the pixels from the screen’s rows 20 through 27, which are the 8 pixels from the character at the position, and then repeat this at the next column 255 times which is the horizontal resolution from Screen 2.</p>

<p>Now the compression magic happens at line 9. We check if the value stored in A by the POINT command is equal to 15 (White), and use the PSET command to light up the pixels at line 48 (G+48) and row F*.5, which basically means “multiply F by 0.5 and set the pixel there”. Since the VDP won’t work with fractioned numbers it will ignore any value after the decimal point, resulting in a pixel set at the same position from the previous when the multiplication result is a fraction. If we change PSET(F*.5,G+48) with (F/2,G+48) we will have the same output but there may be some performance difference that I couldn’t observe so far so your mileage may vary. Line 10 does the same thing but from row 128 onward, showing that the resulting output is twice the number of characters from the original string.</p>

<p>So basically what the code does is to copy the 8 pixels from the first column of the character from row 20 to column 0 and row 48 on the screen, then plot the next 8 pixels in the same column 0, then move to column 1 at row 20 and copy the 3rd and 4rth column in the same place, repeating the same pattern until reaching the end of row 20 at column 256. It’s also interesting to notice that this will work to any string entered at line 5, as long as it only spawns a single line and you don’t mind having the same string repeated in row 48!</p>

<p><img src="/assets/2022/02/Screenshot-2022-02-20-10.14.48-PM.png" alt="" />&lt;/figure&gt;&lt;/div&gt;## Changing and improving the code</p>

<p>This code is nice and short, but boy it’s slow! Using BASIC’s PSET command is not the fastest thing in an MSX machine, so what could we do to improve that? Well, we could code the whole thing in <a href="https://msxpen.com/codes/-MwafdFFy20Q29GAgfPC">assembly</a>!</p>

<p>Will it be as short as the original BASIC program? Nope. I’m quite sure that I could reduce the program to half of its size using shift operators on the BIT and SET/RES routines but I want to leave the code readable and easier to understand.</p>

<p>Will it be faster? It sure will!</p>

<p>Will it be the same logic? Not at all. Some high-level commands that we have in BASIC aren’t easily recreated in ASM, so we had to take some shortcuts, but the results are 99% the same.</p>

<p>Let’s check how the code works:</p>

<div class="language-plaintext highlighter-rouge"><div class="highlight"><pre class="highlight"><code>; bios calls
CHGMOD:		equ 0x005F	;Change the screen mode to the value defined in A
GRPPRT:		equ 0x008D	;BIOS routine to print character in graphic screen mode
CHGET:		equ 0x009F	;Waits for a key to be pressed and stores the value in A
LDIRVM:		equ 0x005C	;Copy BC blocks from VRAM address stored in DE into RAM address stored in HL
LDIRMV:		equ 0x0059	;Copy BC blocks fro RAM address stored ad DE into VRAM address stored in HL
FILVRM:		equ 0x0056	;Fill BC blocks of the VRAM starting at addres stored in HL with the values from A
				;System Variables
				;These two variables aren't documented at Grauw docs, and I found them at
				;https://www.msx.org/forum/msx-talk/development/positioning-grahphical-cursor-in-screen-2
GRPACX:		equ 0xFCB7	;Show or set the current row-position of the cursor
GRPACY:		equ 0xFCB9	;Show or set the Current column-position of the cursor

            			; the address of our program
            org 0xD000

start:
		ld a,2		;We need Screen 2 for this program
		call CHGMOD	;so we call CHMOD with A=2 to change into graphic mode
		ld hl,GRPACX	;We want to print our string of numbers at the column 0 
		ld (hl),0	;and for this we set GPRACX
		ld hl,GRPACY	;The string will be printed at row 16 instead of 20 like in the BASIC program
		ld (hl),16	;making it easier to copy the values ahead
		ld hl,$0600	;$0600 is the VRAM position that correlates with the row 48 in the screen if the name table isn't modified
		ld (Vaddr),hl	;so we save this value in the Vaddr variable
		ld hl,$0200	;$0200 is the VRAM address where we will find the pattern data of string printed on the screen
		ld (copyStringAddr),hl	;so we save this value in the variable copyStringAddr
		ld hl,message	;Let's put the address of the message string in HL
		call printString	;and call our routine to print it
		ld bc,16	;With the string already printed, we set a loop counter on BC the repeat the startLoop code
startLoop:
		push bc		;Save BC on the stack
		call copyString	;Call the copyString routine
		call compressString	;Call the compressString routine that will change the pattern, "compressing" the character
		call pasteString	;Call the pasteString routine that will print the new patters at row 48
		pop bc		;Get BC back from the stack
		DEC BC		;Decreases BC
		ld a,c		;Load C into A
		or b		;Then OR B with A, which will raise the Zero flag in F if BC = 0
		jp nz,startLoop	;repeats the loop until BC = 0

		call CHGET	;Waits for a key to be pressed
		RET		;and returns to BASIC
            
printString:   
		ld a, (hl)	;This is our usual way to print strings in the screen, by loading the value pointed by HL into A
		cp 0 		;and checking if the value in A = 0, which is our end of string control
		ret z		;if Zero flag is raised, return to the Start block
		call GRPPRT	;We call GRPPRT instead of CHPUT because we are using a graphic mode
		inc hl		;Next we increase HL to skip to the next value from message
		jr printString	;and repeat the loop
            
copyString:
		ld hl,(copyStringAddr)	;To copy the pattern from the screen we will load the value from copyStringAddr into HL
		ld de,stringData	;and load in DE the position to stringdata 
		ld bc,16		;and 16 in BC for the number of bytes to be copied from HL to DE
		call LDIRMV		;when LDIRMV is called. This will copy the pattern data from the VRAM into RAM
		ld de,$0010		;We need to increase the position pointed by copyStringAddr, so we load $0010 into DE
		ADD HL,DE		;and add HL with DE, since HL already have the value from the copyStringAddr loaded previously
		ld (copyStringAddr),hl	;then se send the results back to copyStringAddr
		ret			;and return to the StartLoop block
            
compressString:
		ld ix,stringData	;Now comes the tricky part. We load the stringData position into IX
		ld bc,8			;and set a new counter in BC to 8
loop:                                   ;We will check the value from every bit from 6 to 0 (left to right, remember?)
                                        ;and replicate the even bit values into the previous odd ones, reducing 8 bits to 4
		bit 6,(ix)		;Check the value from bit 6 - even  
		call nz,bit7Set		;and set bit 7 if not zero, resulting in bit 7 having the data from both bits 7 and 6
		bit 5,(ix)		;Check the value of bit 5 - odd
		call z,bit6Reset	;and reset bit 6 if zero 
		call nz,bit6Set		;or set bit 6 if not zero
		bit 4,(ix)		;Check the value of bit 4 - even
		call nz,bit6Set		;and set bit6 if not zero, resulting in bit 6 having the values from bits 5 and 4
		bit 3,(ix)		;Check the value of bit 3 - odd
		call z,bit5Reset	;and reset bit 5 if zero
		call nz,bit5Set		;or set bit 5 if not zero
		bit 2,(ix)		;Check the value of bit 2 - even
		call nz,bit5Set		;and set bit 5 if not zero, resulting in bit 5 having the values from bits 3 and 2
		bit 1,(ix)		;Check the value of bit 1 - odd
		call z,bit4Reset	;and reset bit 4 if zero
           	call nz,bit4Set		;or set bit 4 if not zero
		bit 0,(ix)		;Check the value of bit 0
           	call nz,bit4Set		;and set bit 4 if not zero, resulting in bit 4 having the values from bits 1 and 0
					;The block above compresses the 8 bits values into 4 bits, and since a new tile in made of
					;8x8 pixels we can jump ahead and compress the next 8 bits into the second nibble of IX
					;then print 2 characters into a single tile
		bit 7,(ix+8)		;We will do the whole check/reset/set thing again, but this time we will check the data
		call z,bit3Reset	;that is 8 bytes ahead from IX and set the values at the bits between 3 and 0
		call nz,bit3Set		;which will compress the values from the next pattern into the current position pointed by IX
		bit 6,(ix+8)		;so I believe that I don't need to explain everything again, right?
		call nz,bit3Set
		bit 5,(ix+8)
		call z,bit2Reset
		call nz,bit2Set
		bit 4,(ix+8)
		call nz,bit2Set
           	bit 3,(ix+8)
		call z,bit1Reset
		call nz,bit1Set
		bit 2,(ix+8)
		call nz,bit1Set
		bit 1,(ix+8)
		call z,bit0Reset
           	call nz,bit0Set
		bit 0,(ix+8)
           	call nz,bit0Set
            
		inc ix		;When our compressing thing is done with the byte pointed by IX we well jump to the next one
		DEC BC		;and use the method of decreasing BC
		LD A,C		;loading C in A
		OR B		;Doing A OR B which will raise the Zero flag in F
		JP NZ,loop	;and repeat the whole loop again until BC reaches to 0
		ret		;returning the program execution to startLoop

bit7Reset:
		res 7,(ix)	;Lazy coding, but this is all it does: reset the bit 7 and
		ret		;returns

bit7Set:
		set 7,(ix)	;Set the bit 7
		ret		;then returns
            
bit6Reset:
		res 6,(ix)	;Same thing until reaching bit 0
		ret

bit6Set:
		set 6,(ix)
		ret
            
bit5Reset:
		res 5,(ix)
		ret

bit5Set:
		set 5,(ix)
		ret
            
bit4Reset:
		res 4,(ix)
		ret

bit4Set:
		set 4,(ix)
		ret
            
bit3Reset:
		res 3,(ix)
		ret

bit3Set:
		set 3,(ix)
		ret
            
bit2Reset:
		res 2,(ix)
		ret

bit2Set:
		set 2,(ix)
		ret

bit1Reset:
		res 1,(ix)
		ret

bit1Set:
		set 1,(ix)
		ret
            
bit0Reset:
		res 0,(ix)
		ret

bit0Set:
		set 0,(ix)
		ret

pasteString			;Let's print the results from the compressed font
		ld hl,$2600	;Since we don't know what is set at the attribute table
		ld a,$f0	;we well set A to F0, which is white foregroung and transparent background
		ld bc,$FF	;and fill the 256 bytes at the pattern table address $2600
		call FILVRM	;to ensure that our pattern will show in the screen as a white text 
            
		ld de,(Vaddr)	;We load the value from Vaddr into de
		ld hl,stringData;and the stringData into HL
		ld bc,8		;then set the block size to 8
		call LDIRVM	;and copy the data from RAM to the VRAM
            
		ld de,(Vaddr)	;To duplicate the string at the right side of the screen
		ld hl,$0080	;we add $80 to the value pointed by Vaddr
		ADD HL,DE	;and the result will be stored in HL
		PUSH HL		;then we push HL to the stack
		pop DE 		;and bring the value back, but on DE instead

		ld hl,stringData;so we can load the stringData again into HL
		ld bc,8		;define a 8 bytes block in BC
		call LDIRVM	;and call LDIRVM to copy the data from RAM to VRAM, targeting the right side of the screen
            
		ld de,(Vaddr);	;Now we will prepage Vaddr to point to the pattern table related to the next column of the screen
		ld hl,$0008	;by loading $8 into HL
		ADD HL,DE	; and addinng DE with HL, sending the results into HL again
		ld (Vaddr),HL	;which will return the value back to the position related to Vddr
            
		ret		;finally returning to the startLoop block again


Vaddr:				;Our variables are set below
		dw 0
            
copyStringAddr:
		dw 0

message:			;and our original string as well
		db "12345678901234567890123456789012",0         

stringData:
		dw 0 

            ; use the label "start" as the entry point
            end start
</code></pre></div></div>

<p>Notice that not even once I mess with the name table here, and since every time that we change to screen 2 the BIOS will fill the name table with values from 0 the 255 three times, one for each 3rd of the screen, we are playing battleship with the values already set at the VRAM by the BIOS. Is this bad? No, if you keep in mind that you shouldn’t touch the name table - or should if you want to “move things around a little”.</p>

<h2 id="why-all-the-effort-to-do-this">Why all the effort to do this?</h2>

<p>Because it’s fun! I learned a lot reading the original code and learned more while trying to replicate the results without actually doing the same thing. I also played with shift and rotating commands which didn’t end in the article but helped me to understand how it’s possible to reduce the code size and get rid of repetitive commands, and I’m satisfied with the final result. Is it possible to do something better? Yes, it is, and Breno already made this by creating a 64x24 text editor for the MSX!</p>

<p><a href="https://youtu.be/QZmZkiPiBkI">Video</a></p>

<h2 id="thats-enought-for-today">That’s enought for today!</h2>

<p>As usual, leave your comments and questions here, and share this article with your friends and family!</p>]]></content><author><name>Matheus José Geraldini dos Santos</name></author><category term="Assembly" /><category term="MSX Development" /><summary type="html"><![CDATA[Some time ago Breno Motta, who is one of the members of Facebook’s MSX Brasil Oficial group published a picture of a short BASIC program that creates a “compressed” font style with 4 x 8 pixels on Screen 2 based on the text showing on the screen. It was really interesting to see how the program was able to create a really perfectly readable font with such a small footprint, and I got really curious in learning more about how it worked, and I found out that it is really simple but also very clever!]]></summary><media:thumbnail xmlns:media="http://search.yahoo.com/mrss/" url="http://www.oddbitmachine.net/wp-content/uploads/2022/02/Screenshot-2022-02-20-10.14.48-PM.png" /><media:content medium="image" url="http://www.oddbitmachine.net/wp-content/uploads/2022/02/Screenshot-2022-02-20-10.14.48-PM.png" xmlns:media="http://search.yahoo.com/mrss/" /></entry><entry><title type="html">Show your custom font on the MSX screen</title><link href="www.odbitmachine.net/2022/01/26/show-your-custom-font-on-the-msx-screen/" rel="alternate" type="text/html" title="Show your custom font on the MSX screen" /><published>2022-01-27T00:38:17+11:00</published><updated>2022-01-27T00:38:17+11:00</updated><id>www.odbitmachine.net/2022/01/26/show-your-custom-font-on-the-msx-screen</id><content type="html" xml:base="www.odbitmachine.net/2022/01/26/show-your-custom-font-on-the-msx-screen/"><![CDATA[<p>In the previous <a href="https://www.oddbitmachine.net/en/2022/01/18/getting-the-default-msx-font-pattern/">article</a> we learned how to extract the default font pattern from an MSX machine to the TinySprite tool so we could change the design and create our own personal fancy pants font, but all this knowledge is useless if we don’t know how to bring that awesome piece of modern art back to our beloved machine, isn’t right?</p>

<p>To show this process I wanted to create something nice so it would show how amazing a well-designed font can improve games and programs, so I took the opportunity to use the amazing “Arcade Game Typography” book I had waiting on my bookshelf for quite some time.</p>

<p><img src="/assets/2022/01/PXL_20220125_094815921-1-300x300.jpg" alt="" />&lt;figcaption&gt;“Why do you have a book full of letters?” - My Wife&lt;/figcaption&gt;&lt;/figure&gt;&lt;/div&gt;Although we extracted all numbers, uppercase and lowercase characters, and some special symbols, I searched for a special pattern that could make some impact even if it didn’t provide all characters and symbols. The chosen one was from an arcade game that I still love to play but never mastered due to its challenging gameplay: Shinobi</p>
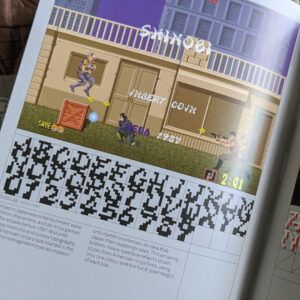
<p><img src="/assets/2022/01/272767745_10224323739074106_8952493667335452438_n-300x300.jpg" alt="" />&lt;figcaption&gt;I spent a lot of my lunch money on this machine back then&lt;/figcaption&gt;&lt;/figure&gt;&lt;/div&gt;With TinySprite open and the default font loaded, all I had to do was to squint my eyes on the book’s page and try to replicate the pattern at the checkered field from each slot. It just took a couple of hours but the work was kinda relaxing, to be honest! Sadly this typeset only has numbers and uppercase letters, so the lowercase letters and symbols will stay the same.</p>
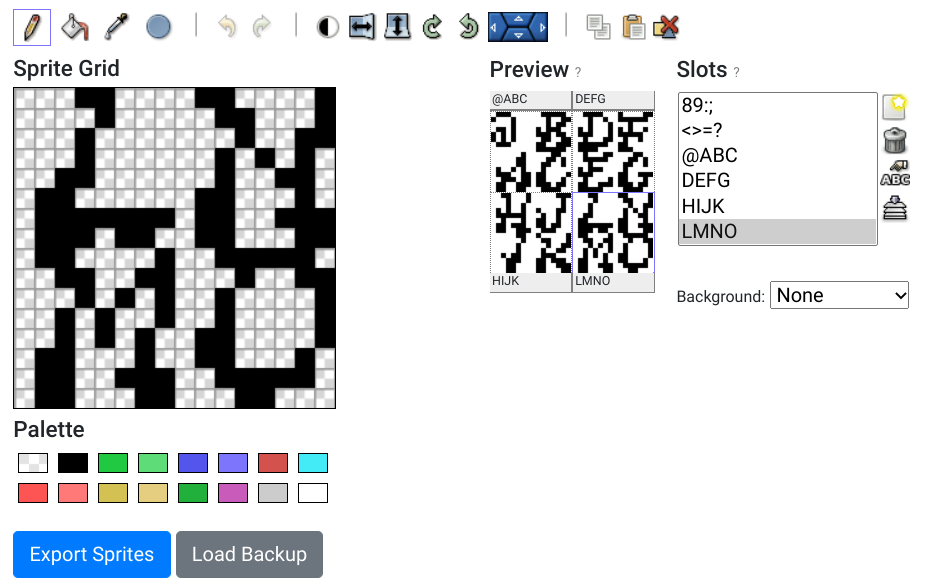
<p><img src="/assets/2022/01/Screenshot-2022-01-26-11.26.03-PM.png" alt="" />&lt;figcaption&gt;It was easier than it actually looks!&lt;/figcaption&gt;&lt;/figure&gt;&lt;/div&gt;With the character pattern done and looking impressively not bad at all, all I had to do was to click in “Export Sprites”, select “ASM Hexa” at the “Export as” field and copy the whole thing to the clipboard. I saved the data in a local file just to be sure, and also generated a backup from my work so I could change it further in the future if needed. Maybe I could also change the lowercase letters if I find the courage for that.</p>
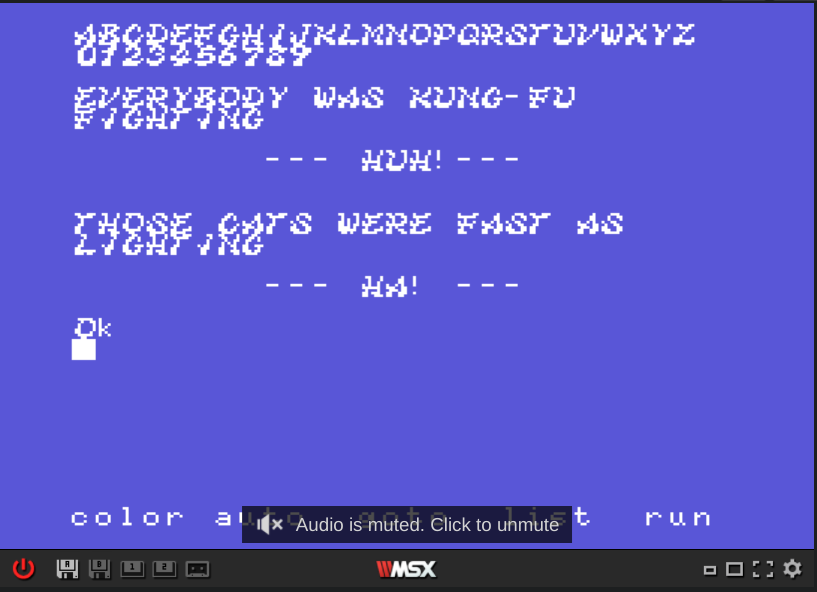
<h2 id="we-got-the-data-now-we-need-the-program">We got the data, now we need the program</h2>

<p>The code to load the pattern data back into the MSX VRAM isn’t complicated at all. I added a routine to print all numbers and uppercase letters so it could show the results after running the program, and also a message just for fun!</p>

<div class="language-plaintext highlighter-rouge"><div class="highlight"><pre class="highlight"><code>CHGMOD: 	equ 0x005f		;Changes the screen mode
LDIRVM: 	equ 0x005C		;Function : Block transfer to VRAM from memory
					;Input    : BC - Block length
           				;			DE - Start address of VRAM
           				;			HL - Start address of memory
CHPUT:  	equ 0x00a2		;Show the content pointed by A on the screen

		org 0xC000		;Alocating the program at the slot 3
    
start:      
		ld a,1			;We load 1 into A	
		call CHGMOD		;then call CHGMOD to change to Screen 1
    		ld hl,ninjaFont		;Point HL to the memory position from the font
		ld de,0x8*48		;then loading into DE the destination at VRAM
    		ld bc,8*70		;and in BC the amount of bytes to be copied
		call LDIRVM		;ending with the routine that copies BC bytes
					;from the position HL on the RAM to the 
					;position DE on VRAM
					;From this point on the pattern is loaded 
					;on the VRAM, and you can use it normally
    
mainloop:				;Let's set a loop to display the font now
		ld b,26			;loading 26 into B = amount of chars to print
		ld c,65			;and 65 into C =  decimal code of the letter A 
		call printChars		;then we call printChars routine
		ld a,"\r"		;We add a "return" code into A
		call CHPUT		;and print it to move the cursor to the
            				;beginnign of the line
		ld a,"\n"		;Next we load a "next line" into A
		call CHPUT		;and print it to move the cursor down
		ld b,10			;Now we can load 10 into B = amount of numbers
		ld c,48			;and 48 into C = decimal code of the number 0
		call printChars		;then we print the numbers from 0 to 9
		ld a,"\r"		;We add a "return" code into A
		call CHPUT		;and print it to move the cursor to the
            				;beginnign of the line
		ld a,"\n"		;Next we load a "next line" into A
		call CHPUT		;and print it to move the cursor down
		ld hl,message		;and we finish by loading our message into HL
		call printMessage	;and call the printMessage to show the text
		ret			;returning to BASIC after that
   
printChars:
		ld a,c			;We load the position pointed by C into A		
		call CHPUT		;and call the routine to show it on the screen
		INC C			;then increment C to the next position
		djnz printChars		;next djnz decreases B and jumps back to
            				;the start of this routine until B = 0
		ret			;which returns the program back to mainloop
printMessage:
		ld a,(hl)		;To print the message we load the content of HL
           				;into A
		cp 0			;We compare A to 0, wich is our EOF
		ret z			;and return to mainloop if the flag Zero raises
		call CHPUT			;otherwise we call CHPUT to print the character
		inc hl			;then we increasing HL to the next position
		jr printMessage		;and repeat the routine until 0 is loaded in A

ninjaFont:				;Copied from the TinySprite export option
        ; --- 0123			;every DB line is referent to one char 
        ; color 1			;and the color here doesn't matter
        DB $0E,$19,$31,$31,$31,$33,$3F,$1E	;Number 0
        DB $06,$0E,$3C,$0C,$08,$18,$38,$38	;Number 1
        DB $1C,$36,$22,$06,$0C,$31,$7E,$7C	;Number 2
        DB $1C,$36,$22,$0C,$02,$46,$7C,$38	;Number 3
        ; 					;and so on...
        ; --- 4567
        ; color 1
        DB $0C,$0C,$1A,$12,$64,$7F,$1E,$38
        DB $26,$1F,$10,$3E,$33,$03,$7E,$38
        DB $0E,$18,$30,$3C,$66,$46,$7C,$38
        DB $42,$7F,$33,$04,$0C,$18,$38,$38
        ; 
        ; --- 89:;
        ; color 1
        DB $1C,$3F,$26,$18,$24,$66,$7E,$3C
        DB $3C,$67,$67,$3E,$0C,$18,$38,$38
        DB $00,$00,$20,$00,$00,$20,$00,$00
        DB $00,$00,$20,$00,$00,$20,$20,$40
        ; 
        ; --- &lt;&gt;=?
        ; color 1
        DB $18,$30,$60,$C0,$60,$30,$18,$00
        DB $00,$00,$F8,$00,$F8,$00,$00,$00
        DB $C0,$60,$30,$18,$30,$60,$C0,$00
        DB $70,$88,$08,$10,$20,$00,$20,$00
        ; 
        ; --- @ABC
        ; color 1
        DB $70,$88,$08,$68,$A8,$A8,$70,$00
        DB $02,$06,$06,$4A,$73,$3B,$67,$66
        DB $3E,$13,$16,$5C,$76,$33,$67,$7E
        DB $0C,$1A,$32,$20,$61,$62,$76,$3C
        ; 
        ; --- DEFG
        ; color 1
        DB $3C,$12,$11,$51,$71,$23,$7E,$78
        DB $23,$3E,$10,$5C,$70,$21,$67,$7C
        DB $43,$7E,$10,$52,$7C,$24,$60,$70
        DB $0C,$1A,$32,$20,$67,$62,$76,$3C
        ; 
        ; --- HIJK
        ; color 1
        DB $31,$11,$12,$52,$7E,$22,$6E,$67
        DB $06,$02,$04,$04,$2C,$1C,$18,$18
        DB $07,$02,$02,$46,$24,$64,$6C,$38
        DB $41,$31,$13,$26,$38,$6E,$67,$63
        ; 
        ; --- LMNO
        ; color 1
        DB $18,$08,$10,$10,$30,$60,$7F,$76
        DB $61,$33,$15,$29,$2A,$62,$67,$63
        DB $61,$31,$13,$2A,$26,$62,$67,$63
        DB $3E,$13,$21,$21,$61,$62,$3E,$18
        ; 
        ; --- PQRS
        ; color 1
        DB $6E,$33,$11,$51,$72,$3C,$60,$60
        DB $0E,$13,$21,$21,$65,$62,$7F,$39
        DB $6E,$33,$11,$53,$7E,$28,$66,$63
        DB $0E,$13,$11,$4C,$26,$63,$73,$3E
        ; 
        ; --- TUVW
        ; color 1
        DB $67,$3E,$10,$10,$30,$60,$60,$60
        DB $63,$31,$11,$21,$21,$62,$7E,$3C
        DB $61,$31,$13,$22,$24,$68,$70,$60
        DB $63,$21,$29,$69,$6B,$7A,$7E,$34
        ; 
        ; --- XYZ[
        ; color 1
        DB $31,$11,$0A,$0C,$3C,$76,$67,$63
        DB $31,$11,$1A,$0C,$0C,$18,$18,$18
        DB $33,$1E,$04,$08,$10,$71,$7F,$66
        DB $0E,$08,$08,$08,$08,$08,$0E,$00
        ; 
        ; --- \^]_
        ; color 1
        DB $00,$00,$80,$40,$20,$10,$08,$00
        DB $70,$10,$10,$10,$10,$10,$70,$00
        DB $20,$50,$88,$00,$00,$00,$00,$00
        DB $00,$00,$00,$00,$00,$00,$F8,$00
        ; 
        ; --- `abc
        ; color 1
        DB $40,$20,$10,$00,$00,$00,$00,$00
        DB $00,$00,$70,$08,$78,$88,$78,$00
        DB $80,$80,$B0,$C8,$88,$C8,$B0,$00
        DB $00,$00,$70,$88,$80,$88,$70,$00
        ; 
        ; --- defg
        ; color 1
        DB $08,$08,$68,$98,$88,$98,$68,$00
        DB $00,$00,$70,$88,$F8,$80,$70,$00
        DB $10,$28,$20,$F8,$20,$20,$20,$00
        DB $00,$00,$68,$98,$98,$68,$08,$70
        ; 
        ; --- hijk
        ; color 1
        DB $80,$80,$F0,$88,$88,$88,$88,$00
        DB $20,$00,$60,$20,$20,$20,$70,$00
        DB $10,$00,$30,$10,$10,$10,$90,$60
        DB $40,$40,$48,$50,$60,$50,$48,$00
        ; 
        ; --- lmno
        ; color 1
        DB $60,$20,$20,$20,$20,$20,$70,$00
        DB $00,$00,$D0,$A8,$A8,$A8,$A8,$00
        DB $00,$00,$B0,$C8,$88,$88,$88,$00
        DB $00,$00,$70,$88,$88,$88,$70,$00
        ; 
        ; --- pqrs
        ; color 1
        DB $00,$00,$B0,$C8,$C8,$B0,$80,$80
        DB $00,$00,$68,$98,$98,$68,$08,$08
        DB $00,$00,$B0,$C8,$80,$80,$80,$00
        DB $00,$00,$78,$80,$F0,$08,$F0,$00
        ; 
        ; --- tuvw
        ; color 1
        DB $40,$40,$F0,$40,$40,$48,$30,$00
        DB $00,$00,$90,$90,$90,$90,$68,$00
        DB $00,$00,$88,$88,$88,$50,$20,$00
        DB $00,$00,$88,$A8,$A8,$A8,$50,$00
        ; 
        ; --- xyz
        ; color 1
        DB $00,$00,$88,$50,$20,$50,$88,$00
        DB $00,$00,$88,$88,$98,$68,$08,$70
        DB $00,$00,$F8,$10,$20,$40,$F8,$00
        DB $00,$00,$00,$00,$00,$00,$00,$00
        
message:		; Then we set our message here with the \r\n for like break
        db "\nEVERYBODY WAS KUNG-FU \r\nFIGHTING\r\n\n"
        db "\t--- HUH!---\r\n\n"
        db "\nTHOSE CATS WERE FAST AS\r\nLIGHTING\r\n\n"
        db "\t--- HA! ---\r\n\n",0 
        end start	; and this ends the code
</code></pre></div></div>

<p>You can run the program directly on MSXpen site through <a href="https://msxpen.com/codes/-MuLW5c19XuqSIITI2j6">this link</a>, and removing the mainloop, printchar and printmessage routines will allow you to load the font design on your machine and use the characters in BASIC programs. How cool is that?</p>

<p><img src="/assets/2022/01/Screenshot-2022-01-27-12.34.06-AM.png" alt="" />&lt;figcaption&gt;Did you know that CeeLo Green changed the lyrics from Kung-Fu fighting to make it less offensive? &lt;/figcaption&gt;&lt;/figure&gt;## Are we done with all this font thing?</p>

<p>Almost! Next article I will show how to set colors for the fonts and any other neat trick I may learn until then. In the meantime have fun with the ninja font!</p>]]></content><author><name>Matheus José Geraldini dos Santos</name></author><category term="Assembly" /><category term="MSX Development" /><summary type="html"><![CDATA[In the previous article we learned how to extract the default font pattern from an MSX machine to the TinySprite tool so we could change the design and create our own personal fancy pants font, but all this knowledge is useless if we don’t know how to bring that awesome piece of modern art back to our beloved machine, isn’t right?]]></summary><media:thumbnail xmlns:media="http://search.yahoo.com/mrss/" url="http://www.oddbitmachine.net/wp-content/uploads/2022/01/Screenshot-2022-01-27-12.34.06-AM.png" /><media:content medium="image" url="http://www.oddbitmachine.net/wp-content/uploads/2022/01/Screenshot-2022-01-27-12.34.06-AM.png" xmlns:media="http://search.yahoo.com/mrss/" /></entry><entry><title type="html">Getting the default MSX font pattern</title><link href="www.odbitmachine.net/2022/01/18/getting-the-default-msx-font-pattern/" rel="alternate" type="text/html" title="Getting the default MSX font pattern" /><published>2022-01-19T00:32:12+11:00</published><updated>2022-01-19T00:32:12+11:00</updated><id>www.odbitmachine.net/2022/01/18/getting-the-default-msx-font-pattern</id><content type="html" xml:base="www.odbitmachine.net/2022/01/18/getting-the-default-msx-font-pattern/"><![CDATA[<p>In the last article, we learned how to modify a single character from the original MSX font type, and we also found out the differences between Screen 0 and Screen 1 character, but now what we want to do is to create our own personal font type as artsy as possible. Fancy!</p>

<p>Before we start designing our character pattern, I thought “wouldn’t be nice to have the original pattern so we could see what we are actually doing?”. Sure I’m no professional font designer, and the best I can do is to stretch some vowels and add some curves at the consonants, and for that, I definitely need to have the original character showing on the screen for reference.</p>

<h2 id="where-do-the-character-fonts-come-from">Where do the character fonts come from?</h2>

<p>Now there is something I’ve always taken for granted and never imagined that would be something noticeable, but every computer comes with a pre-defined font pattern stored somewhere, otherwise, it wouldn’t print anything readable on the screen.</p>

<p>On an MSX machine, as stated on the MSX.org <a href="https://www.msx.org/wiki/MSX_font">wiki</a> page, the font pattern is copied from the main ROM to the VRAM every time we invoke the Screen routine to set the screen mode, replacing any pattern currently stored at the VRAM. While on Screen 0 (40x24 text mode) the pattern occupies 2 KB of VRAM from 0800H to 0FFFH, and on Screen 1 (32x24 text mode) the pattern also uses 2 KB of VRAM from 0000H to 07FFH, and this information is important because we are about to copy the pattern from the address defined by the video mode to the RAM, so we can print the patterns in the screen and do some cool stuff with that.</p>

<p>It took me quite some time to figure out what I should do to move the pattern data between MSXPen and TinySprite since these are the two tools I rather use in my Chromebook when I do my research. There are several other tools out there that run on Windows, Linux, macOS, and even in real MSX machines, but I want to avoid anything that cannot be promptly used from the browser, and I even may create some online tools in the future to make things easier but that’s something for another day.</p>

<p>At first, I created <a href="https://msxpen.com/codes/-Mtc7V8eX66q0sldaULL">this code</a> that copies the data from the address 0x8*49 (Pattern for the character 0) to the RAM, then uses the <code class="language-plaintext highlighter-rouge">bit</code> command to compare each bit from the bytes of the pattern and print “0” or “1” based on the result from the command, and it’s important to notice that we aren’t storing the results in any other place than the actual screen. Using the MSXWeb emulator from the MSXPen site we can press the “alt+c” key combination to copy the screen content to the clipboard (yep, I’m that old, and yep, it’s the actual name of this function) so then we can paste it in a text file.</p>

<p><img src="/assets/2022/01//2022/01/Screenshot-2022-01-17-11.33.04-PM.png" alt="" />
Alt+c copies the text from the screen on the MSX web emulator</p>
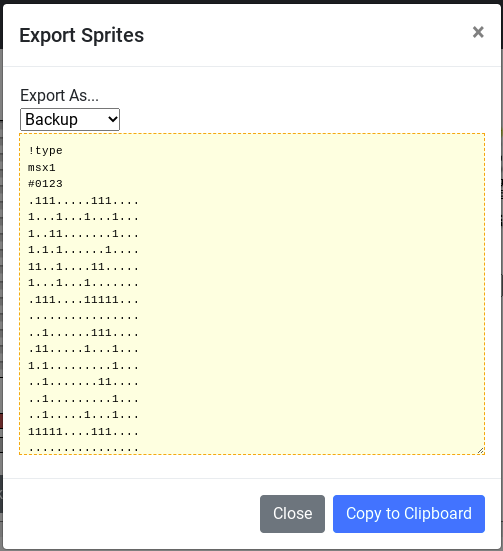
<p>The code with the usual comments is the following:</p>

<div class="language-plaintext highlighter-rouge"><div class="highlight"><pre class="highlight"><code>CHGMOD:		equ 0x005f		;BIOS call to change the screen mode
CHPUT:		equ 0x00a2		;Prints the contents points by A on the screen
CLS:		equ 0x00C3		;Clear the screen. call XOR A before to clean up the Zero flag 
ERAFNK:		equ 0x00CC		;Remove the function keys from the screen
CHGET:		equ 0x009F		;Wait for a key to be pressed 
LDIRMV:		equ 0x0059		;Copies A blocks from the address HL of the VRAM into address DE in RAM
            
		org 0xc000		; Storing the program at page 3
        
main:
		ld a,1			;We set the screen mode 1 loading the value into A
		call CHGMOD		;then we call CHGMOD to change the video mode
		call ERAFNK		;Removing the function keys so it's not copied through alt+c
		ld hl,0x8*49		;Loading into HL the position for the first pattern. Each pattern uses 8 bytes
					;so we multiply 8 by the inicial character pattern at position 49 = 0
		ld de,font		;Load into DE the position where the VRAM pattern will be copied
 	       ld bc,8*74		;We want 74 characters copied, from 0 through "z"
	        call LDIRMV		;Calls the routine to copy data from VRAM to RAM
	        ld hl,font		;We load the address defined for "font" into HL 
	        ld bc,74		;then we set the counter on BC for the main loop 
	        ld d,49			;and store in D the value for the first character (0) to print later
		call loop		;Calling the main loop
	        ret			;then returning to BASIC when BD decreases to 0
loop:   
		push BC			;Let's send BC to the stack
		push DE			;followed by DE
		XOR A			;This should reset the Zero flag
		CALL CLS		;so we can call CLS to clear the screen
		ld b,8			;Loading 8 into B to iterate on each bytes of the character pattern 
		pop DE			;Let's bring DE back from the stack
		ld a,";"		;Load the character ";"into A
		call CHPUT		;then print it before printing the current character being shown
		ld a,d			;Get the value from D and load into A
		call CHPUT		;and print it, which corresponds to the letter being iterated ahead
		inc d			;We decrease D
		ld a,"\r"		;Load the ASCII code for return into A
		call CHPUT		;Then print it to return to the start of the line
		ld a,"\n"		;next we load the ASCII code for new line into A
		call CHPUT		;then print it, moving the cursor to the new line below
		call iterate		;Calls the iterate routine that prints the pattern as binary
		call CHGET		;Waits for a key to be pressed after printing the pattern of each letter
		POP BC			;Brings back BC from the stack
		dec BC			;Decrements BC
		LD A,C			;Loads C into A
		OR B 			;And excutes A OR B
		JR NZ,loop		;While the zero flag is not raised repeats the loop
		ret			;Returns to the main routine

iterate:			;This routine probably can be improved using shift operations
				;but to keep things simple to understand I left it as it is
		bit 7,(hl)		;Reads the first bit from the byte pointed by HL
		call z,zero		;and calls the zero routine if the result is zero
		call nz,one		;otherwise calls the one routine
		bit 6,(hl)		;Same thing but with the next bit
		call z,zero		;so we repeat the whole process
		call nz,one      	;on every bit from the by pointed by HL
		bit 5,(hl)		;and call the proper routine to print
		call z,zero		;the ASCII character related to the value
		call nz,one		
		bit 4,(hl)
		call z,zero
		call nz,one	
		bit 3,(hl)
		call z,zero
		call nz,one
		bit 2,(hl)
		call z,zero
		call nz,one
		bit 1,(hl)
		call z,zero
		call nz,one
		bit 0,(hl)
		call z,zero
		call nz,one
		ld a,"\n"		;After the last bit is checked we add a new line
		call CHPUT		;and print it
		ld a,"\r"		;then we add a carriage return
		call CHPUT		;and aso print it
		inc hl			;Increase HL to get the next byte
		djnz iterate		;And do this until B reaches 0
		ld a,"\n"		;At the end of the iteration we add another new line
		call CHPUT		;and print it
		RET			;returning to the loop routine
zero:
		ld a,"0"		;We load the ASCII character "0" into A
		call CHPUT		;then print it
		RET			;and return to the caller from the iterate routine
one:
		ld a,"1"		;We load he ASCII character "1" into A
		call CHPUT		;then print it
		RET			;abd return to the caller from the iterate routine

font:
		DB 0			;Initial value of font
		end main		;This ends the program as required by the MSXPen code parser
</code></pre></div></div>

<p>In the end, this resulted in a pretty simple and functional program but very limited use, unless you are looking to use a text editor to create your font patterns in binary.</p>

<h2 id="but-can-we-make-something-better">But, can we make something better?</h2>

<p>Of course, we can! We need to transfer the original font patterns from the WebMSX emulator to the TinySprite tool, and the binary format is not useful for this requirement.</p>

<p>The TinySprite tool allows us to import pattern designs through two different methods:</p>

<ol>
  <li>Using the “Load Backup” button and pasting the backup in the widget field</li>
</ol>

<p>Notice that the tool uses a proprietary backup format that, although being in text mode, needs to follow the proper parameters otherwise it will result in garbage being loaded into the slots. This is how a TinySprite backup looks like:</p>

<p><img src="/assets/2022/01/Screenshot-2022-01-18-7.06.51-PM.png" alt="" />
TinySprite backup format</p>

<p>The header describes the sprite type (MSX1/MSX2), the name of the slot (0123 for this example), then we have the pattern where dots are empty/transparent spaces and the numbers are related to the color used by the pixel at the positions.</p>

<p>The Export Sprites and Load Backup are the options available to provide data persistence on the tool, since every time the site is closed or even reloaded all content is lost. Don’t say I didn’t warn you about that!</p>

<ol>
  <li>Use the “Import DATA into Slot”</li>
</ol>

<p>This option is available through the last icon from the right side of the Slots field, the one with the arrow pointing down to a bunch of pages that look like a continuous form paper from the days of yore:</p>

<p><img src="/assets/2022/01/Screenshot-2022-01-18-6.49.10-PM.png" alt="" /></p>

<p>The “Slots” field</p>

<p>This one is really useful since we can load patterns into a single slot, and it’s what we will use to transfer the data from the WebMSX output, but it has some limitations. I couldn’t load any data using binary format into the slots, and the only format that worked for me was in hexadecimal, so this is what I’m going to use here.</p>

<p>It took me quite some time to figure out what would be the best way to transform my requirements into a useful code. I tried to do some crazy stuff like storing the values in the RAM then changing the screen mode back to 40x24 text mode, then writing the data on a device, and then showing the information one character at a time, but in the end, I finally came with a solution that delivered what I needed quite well! The best thing is that I could find a complete assembly code that <a href="https://stackoverflow.com/questions/22838444/convert-an-8bit-number-to-hex-in-z80-assembler">transforms decimal values into hexadecimal</a>, and this saved me a lot of time, to be honest! Thank God for StackOverflow!</p>

<p>Here is the code that prints all patterns for the characters between the number 0 through the lower case letter “z”:</p>

<div class="language-plaintext highlighter-rouge"><div class="highlight"><pre class="highlight"><code>; bios call to print a character on screen
CHGMOD:		equ 0x005f		;Changes the screen mode
WRTVRM: 	equ 0x004d		;Grava na VRAM no endereco HL o conteudo de A
CHPUT:  	equ 0x00a2		;Imprime o conteudo de A na tela
LDIRMV:		equ 0x0059		;Copies A blocks from the address HL of the VRAM into address DE in RAM
ERAFNK: 	equ 0x00CC		;Removes the function key from the screen
LINL32:		equ 0xF3AF		;Width for SCREEN 1 (default 29)
CHGET: 		equ 0x009F		;Waits for a key to be pressed
CLS: 		equ 0x00C3		;Clear screen. Requires Zero flag to be set, so XOR A should do the trick

		org 0xD000		;Lets store the program at page 3

start:
		ld hl,LINL32		;We are changing the screen width in mode 1 
		ld (hl),32		;by setting the value 32 at the address opinterd 
		ld a,1			;then loading 1 into register A
		call CHGMOD		;and calling CHGMOD routine
       		call ERAFNK		;Lets remove the function keys from the screen so it's not copied along with the data
        	ld hl,0x8*48		;We will copy the data from the VRAM from the 48th character (0), so we multiply it by
					;8 which is the size of each pattern
		ld de,font		;Loading into DE the memory position for the font
        	ld bc,75*8		;We want to copy 8 bytes of 75 character patterns, so BC will be set as 75*8
        	call LDIRMV		;Call the routine to copy the data from VRAM to RAM
		ld hl,font		;Let's put the RAM position where the pattern were copied into HL
		ld b,5			;Then set 5 into B as the number of pages with the hexadecimal output
initial:            
		push BC			;Save BC in the stack
		ld b,16			;Load 16 into b, which will be the counter for character patterns per page
		ld c,1			;Load 1 into C, which will be used to add a break line after 4 lines of patterns
		call mainloop		;Calls the main loop
		call CHGET		;Wait for a key to be pressed to control the output pagination
		xor a			;Raising the Zero flag
		call CLS		;so we can clear the screen calling the routine CLS
		POP BC			;Bringing back BC from the stack
		djnz initial		;then looping through initial until B decreases to zero
		ret			;end program and returns to BASIC, hopefully
mainloop:
		PUSH BC			;Saving the values from BC into the stack
		ld b,8			;Loading 8 into B, which will be the counter for loop
		call loop		;Calling the loop routine
		ld a,"\r"		;We add ASCII code for carriage return into A
		call CHPUT		;then we print it
		ld a,"\n"		;next we load the next line into A
		call CHPUT		;and calls CHPUT again, jumping the cursor to the beginning of a new line
		pop BC			;Getting BC back from the stack
		inc hl			;Incrementing HL to proceed to the next character pattern
		ld a,c			;Now we will load the value from C into A
		cp 4			;And compare it with 4, which will take care of the line break for each block
		call z,skip4		;If CP 4 raizes the zero flag, we call the skip4 routine
		INC C			;Incrementing the counter at C
		djnz mainloop		;Then looping through mainloop until B decreases to zero
		ret			;which allows to return the program back to the initial routine
            
skip4:
		ld c,0			;Load 0 into C to reset the counter
		ld a,"\n"		;Then once again we print new line
		call CHPUT		;and
		ld a,"\r"		;carriage return
		call CHPUT		;on the screen, creating an empty line between blocks of 4 character patterns
		ret			;and return to the mainloop
loop:
		ld a,"$"		;each hexadecimal value needs to be preceeded by the dollar sign
		call CHPUT		;so we print it first during the loop
		ld a,(hl)		;now we load the value where HL is pointing at
		call NumToHex		;and call the NumToHex to transform the decimal value into hexadecimal
		ld a,d			;The NumToHex return the values on DE, do we first load D into A
		call CHPUT		;and print the first digit of the hexadecimal value
		ld a,e			;then we load E into A
		call CHPUT		;to print the second digit of the hexadecimal value
		djnz loop2		;and jump into loop2 until B decreases to 0, to avoid adding a comma at the
					;end of the line with the pattern data 
		ret			;finishing the loop and returning to the mainloop routine
loop2:            
		ld a,","		;the loop2 will add a comma between the hexadecimal values
		call CHPUT		;and print it
		inc hl			;then increase the position pointed by HL
		jr loop			;and repeat the loop routine

NumToHex:    				;Routine borrowed from
					;https://stackoverflow.com/questions/22838444/convert-an-8bit-number-to-hex-in-z80-assembler
		ld c, a			;a = number to convert
		call Num1		;calls the Num1 routine
		ld d, a			;then loads A into D
		ld a, c			;and restores the value of A from C
		call Num2		;calling the Num2 routine after that
		ld e, a			;and loading A into E
		ret			;return with hex number in DE

Num1:
		rra			;9-bit rotation to right - http://z80-heaven.wikidot.com/instructions-set:rr 
		rra			;rotates A to the right again
		rra			;and again
		rra			;and once more
Num2        
		or $F0			;execute an OR operation on A and $F0
		daa			;the A register is BCD corrected using the contents of the flags
					;http://z80-heaven.wikidot.com/instructions-set:daa
		add a, $A0		;load $40 into A
		adc a, $40		;Ascii hex at this point (0 to F)   
		ret			;and returns to the NumToHex routine
font:
		db 0
		; use the label "start" as the entry point
		end start
</code></pre></div></div>

<p>The program can be executed at MSXPen from <a href="https://msxpen.com/codes/-MthG1d2CB4xMFMb9ItJ">this link</a>, and after each page is printed you can use Alt+C to copy the content to the clipboard as shown here:</p>

<p><img src="/assets/2022/01/Screenshot-2022-01-18-11.59.34-PM.png" alt="" />
Copying the hexadecimal values from WebMSX&lt;</p>

<p>Next, we just need to use the “Import DATA into slot” option from TinySprite to load the patterns. Notice that we need to enter only 4 lines of patterns on each slot, and that’s why the code adds a space after four lines with data. See how nice a person I am?</p>

<p><img src="/assets/2022/01/Screenshot-2022-01-19-12.02.55-AM.png" alt="" /></p>

<p>Importing data into a slot</p>

<p>Wash, rinse, and repeat until all characters are loaded into 19 slots of the TinySprite tool. I also changed the names of each slot to make things easier.</p>

<p><img src="/assets/2022/01/Screenshot-2022-01-19-12.18.00-AM-1024x564.png" alt="" /></p>

<p>All character patterns loaded in TinySprite</p>

<h2 id="can-it-be-just-a-little-easier">Can it be just a little easier?</h2>

<p>Yes, it can! Just download the TinySprite backup file below, copy its content and paste at the tool’s “Load Backup” widget!</p>

<p><a href="/assets/2022/01/MSX-ROM-Characters.txt">MSX-ROM-Characters</a>
<a href="/assets/2022/01/MSX-ROM-Characters.txt">Download</a></p>

<p>Now we have everything we need to create that amazing font type we always wanted, and load it back on our MSX machines to print amazing texts! But this is a subject for another article. Until then have fun modifying your character patterns but don’t forget to back up your work after finishing!</p>]]></content><author><name>Matheus José Geraldini dos Santos</name></author><category term="Assembly" /><category term="MSX Development" /><summary type="html"><![CDATA[In the last article, we learned how to modify a single character from the original MSX font type, and we also found out the differences between Screen 0 and Screen 1 character, but now what we want to do is to create our own personal font type as artsy as possible. Fancy!]]></summary></entry><entry><title type="html">Modifying the MSX character style</title><link href="www.odbitmachine.net/2021/12/05/modifying-the-msx-character-style/" rel="alternate" type="text/html" title="Modifying the MSX character style" /><published>2021-12-05T16:04:08+11:00</published><updated>2021-12-05T16:04:08+11:00</updated><id>www.odbitmachine.net/2021/12/05/modifying-the-msx-character-style</id><content type="html" xml:base="www.odbitmachine.net/2021/12/05/modifying-the-msx-character-style/"><![CDATA[<p>Knowing how to print characters on the screen using Assembly is nice, but creating your character style is the kind of thing that makes you feel awesome! At least this is how I felt after doing that, so let’s see if you also have the same satisfaction after this article.</p>

<p>The MSX standard provides pre-defined 256 characters as explained on this <a href="https://www.msx.org/wiki/MSX_Characters_and_Control_Codes">MSX Resource center page</a>, and we can notice that the character set changes depending on the region where the machine was developed. It’s also important to notice that all characters from 0 through 31 are control characters and cannot be printed on the screen and also cannot be redefined but from the character 32 (space) through 255 everything can be shown on the display. So why not start our work by printing all visible characters on the screen using both Screen 0 and 1?</p>

<div class="language-plaintext highlighter-rouge"><div class="highlight"><pre class="highlight"><code>; BIOS calls
CHGMOD:  equ 0x005f    ; BIOS call to change the screen mode defined at A
CHPUT:   equ 0x00a2    ; BIOS call to print a character at the screen
CHGET:   equ 0x009f    ; BIOS call to wait for a key to be pressed
; System variables
LINL40:  equ 0xF3AE    ; Width for SCREEN 0 (default 37)
LINL32:  equ 0xF3AF    ; Width for SCREEN 1 (default 29)
; Local custom values
COUNT:   equ 255-32    ; Defining the total value for the character count
CSTART:  equ 32        ; Defining the start of the character count


        org $D000      ; Our program will be stored at position $D000 in the memory

start:                 ; Program start
	ld hl,LINL40   ; Loads the system variable LINL40 address into HL
        ld (hl),40     ; then changes the value from the default 37 to 40
        ld a,0         ; We will load the value 0 into the Accumulator
        call CHGMOD    ; then we will call CHGMOD to change the video mode to screen 0 and width to 40
        ld b,COUNT     ; Let's create a counter by loading at register B the end value
        ld c,CSTART    ; and loading at register C the starting value
        call PrintLoop ; We can now call the routine PrintLoop to show the characters with values within our counter
        call CHGET     ; After printing the characer set, we wait for any key to be pressed before changing the screen mode again
        ld hl,LINL32   ; Loads the system variable LINL32 address into HL
        ld (hl),32     ; then changes the value from the default 29 to 32
        ld a,1         ; Load 1 into A 
        call CHGMOD    ; then call CHGMOD to change the screen mode to 1 and screen width to 32
        ld b,COUNT     ; We set the counter again the same way we did before for screen 0
        ld c,CSTART    ; 
        call PrintLoop ; then we call the routine PrintLoop again
        call CHGET     ; and wait for a key to be pressed
        ret            ; before returning to BASIC

PrintLoop:             ; Our usual routine to show characters at the screen
        LD a,c         ; We load the value from C into A, which corresponds to the current value of the counter
        call CHPUT     ; Send the character related to the value stored at A to the screen
        inc c          ; Increments the value at C
        djnz PrintLoop ; The djnz command decrements the value of B and compares to to 0, jumping to PrintLoop if the result is false
        ret            ; Returns to the part of the code that called the routine
        end start      ; Program end
</code></pre></div></div>

<p>The difference between<a href="https://msxpen.com/codes/-Mq7U4q6p0Y7_H1g6YKU"> this program</a> and the one from the <a href="https://www.oddbitmachine.net/en/2021/11/23/working-with-screens-and-printing-texts/">previous article</a> is that we are printing every character based on the values from the counter defined as <code class="language-plaintext highlighter-rouge">CSTART</code> through <code class="language-plaintext highlighter-rouge">COUNT</code>, instead of having a message stored previously. We have a new assembly instruction here – <code class="language-plaintext highlighter-rouge">djnz</code> – which is <a href="http://z80-heaven.wikidot.com/instructions-set:djnz">defined</a> as the following:</p>

<blockquote>
  <p>Decreases B and jumps to a label if not zero. Note that DJNZ does a relative jump, so it can only jump between 128 bytes back/ahead.</p>
</blockquote>

<p>There are other methods to create loops that can be more useful especially if we are dealing with 16-bit values, but we will discuss them in later articles. For now, we are happy to count from 0 to 255 and use <code class="language-plaintext highlighter-rouge">djnz</code> to jump to a nearby place in the code for our little character printing loop.</p>

<p>As I said in the previous article, the TMS9918 resolution is always fixed at 256x192 pixels independent of the screen mode used, so in order to fit 40 characters per line on Screen 0 (<a href="https://github.com/gseidler/The-MSX-Red-Book/blob/master/the_msx_red_book.md#40x24_text_mode">40x24 text mode</a>) the system reduces the size of each character to 6x8 pixels, resulting in a total of 240 available pixels per line and discarding the remaining pixels. In terms of readability, it’s not totally bad, but for my new font type I choose to use Screen 1 (<a href="https://github.com/gseidler/The-MSX-Red-Book/blob/master/the_msx_red_book.md#32x24_text_mode">32x24 text mode</a>) so I could use the entire 8x8 pixels available for my “art”. Another downside from Screen 0 is that we cannot change the font colors like Screen 1, although in the latter we can only change colors for an entire 8 character block, it’s still better than no option at all.</p>

<p>Oddly both screens 0 and 1 don’t start with the maximum width available for each of the modes, so we have to change the values from <code class="language-plaintext highlighter-rouge">LINL40</code> and <code class="language-plaintext highlighter-rouge">LINL32</code> system variables to fill the screen lines completely. Below are the default character sets available for a standard AMERICA/NTSC MSX system:</p>

<p><img src="/assets/2021/12/Screenshot-2021-12-05-1.26.13-PM.png" alt="" />
<img src="/assets/2021/12/Screenshot-2021-12-05-1.26.22-PM.png" alt="" />
Screen 0 / 1 character set</p>

<h2 id="can-we-start-changing-things-now-please">Can we start changing things now, please?</h2>

<p>Sure we can! Let’s replace these boring type sets with something more interesting. But how do we do that?</p>

<p>I’m not an artist at all, but I can try to do something different, and eventually, something interesting may come out. Knowing that the character pattern is a simple 8x8 pixels array and any tool that could give me the resulting in binary or hexadecimal from this could do the trick, I decide to use Jannone’s <a href="http://msx.jannone.org/tinysprite/tinysprite.html">TinySprite</a> tool for this work. Here is the design I created for the new letter A, fancy isn’t it?</p>

<p><img src="/assets/2022/12/Screenshot-2021-12-05-1.59.00-PM.png" alt="" />
TinySprite was designed to work with 16x16 pixels sprites and is not the best tool to draw a single 8x8 pixels character pattern, but we just needed to ignore the additional DB lines filled with 0 values to end up with the desired output.</p>
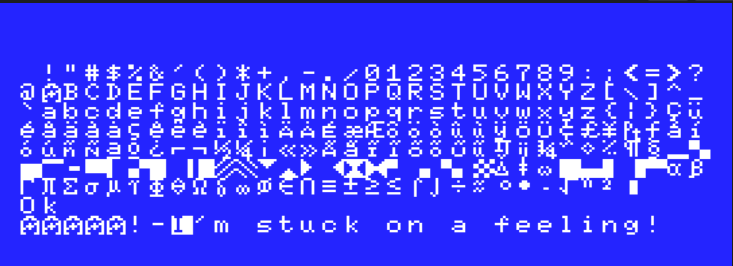
<div class="language-plaintext highlighter-rouge"><div class="highlight"><pre class="highlight"><code>; --- Slot 0
; color 1
DB 00111000b
DB 01101100b
DB 10000010b
DB 10010110b
DB 10111010b
DB 11010010b
DB 10000010b
DB 11000110b
</code></pre></div></div>

<p>Now that we have the pattern for our new character A, we just need to put the information at the correct place in the VRAM and check the results:</p>

<div class="language-plaintext highlighter-rouge"><div class="highlight"><pre class="highlight"><code>; BIOS calls 
CHGMOD:  equ 0x005f	; BIOS call to change the screen mode defined at A
WRTVRM:  equ 0x004d	; BIOS call to write the content from A at position HL in VRAM
CHPUT:   equ 0x00a2	; Imprime o conteudo de A na tela
; System variables
LINL32:  equ 0xF3AF	; Width for SCREEN 1 (default 29)

        org 0xC000	; ALocating the program at 0xC000 (slot 3)
    
start:
        ld hl,LINL32    ; Loads the system variable LINL32 address into HL
        ld (hl),32      ; then changes the value from the default 29 to 32
        ld a,1		; Load 1 into a
        call CHGMOD	; then call CHGMOD to change the screen mode to 1 and screen width to 32
        ld de,LetterA	; Loads the LetterA position into DE to be used at the loop
        ld hl,0x0208	; Loads into HL the VRAM position referring to the character A pattern
	ld b,8		; Let's create a counter to load all 8 bytes related to LetterA pattern into B
    	ld c,0		; and set into C the inital value for the counter, so it goes from 0 through 7
    
mainloop:
	ld a,(de)	; Loads into A the current value pointed by DE
	call WRTVRM	; Calls the BIOS routine that loads the value from A into the VRAM at the position HL
    	inc de		; Increments DE to fetch the next value from LetterA
        inc hl		; Increments HL to set the next position at the VRAM
	djnz mainloop	; The djnz command decrements the value of B and compares to to 0, jumping to PrintLoop if the result is false

        ld b,224	; Now we can create a new counter from 32 through 255
        ld c,32		; so we can once again print all visible characters at the Screen 1
        call PrintTypeset ; Calls our PRintTypeset to print all visible characters
        ret		; Return to BASIC
   
PrintTypeset:
        ld a,c		; Loads the value from C into A - from 32 through 255
        call CHPUT	; Prints the character related to the value loaded into A on the screen
        INC C		; Increments C for the next loop execution
        djnz PrintTypeset ; The djnz command decrements the value of B and compares to to 0, jumping to PrintLoop if the result is false
        ret		; REturn to the part of the code that called the PrintTypeset routine
    
LetterA:		; This is the pattern create for the letter A to be load on the  VRAM
        DB 00111000b    ; At screen1,the pattern table starts at 0x0000
        DB 01101100b    ; It's possible to use binary or hexadecimal values here
        DB 10000010b    ; but right now let's use binary since it's easy to manually
        DB 10010110b    ; change the character pattern
        DB 10111010b
        DB 11010010b
        DB 10000010b
        DB 11000110b
    	end start       ; Closes the program
</code></pre></div></div>

<p>The <a href="https://msxpen.com/codes/-NtoWrQg76brS8R-Cd6S">resulting program</a> shows the new letter A on the screen. Can you spot it in less than 3 seconds?</p>

<p><img src="https://www.oddbitmachine.net/wp-content/uploads/2024/03/image.png" alt="" /></p>

<p>The most interesting instruction here is the BIOS call <code class="language-plaintext highlighter-rouge">WRTVRM</code>, which is one of the methods available to transfer data from the value stored at register A into the VRAM at the position defined by the register <code class="language-plaintext highlighter-rouge">HL</code>. This call only moves a single 8-bit value per call, so it’s not the best option in case of having to move a longer block of data to the VRAM. I’m using this call in my example to make things simpler to understand and easy to demonstrate, but in the future, we will move to a more powerful call for the same action.</p>

<p>In Screen 1 (32x24 text mode) the Character Pattern Table occupies the VRAM from 0000H to 07FFH. I’m using the 0xnnnn notation so it translates to 0x0000 through 0x7000, but another possible notation for that would be $0000 through $7000, which we might start using in the future for better visualization.</p>

<p>Since the first visible character is the one with the value 32, and we know that each character is comprised of 8 lines of 8bits (or 8 bytes for short), we then multiply the first character value by 8 to have the VRAM position for the first printable character: 8 * 32 = 256, or 0x0100 in hexadecimal. Our target at this moment is actually the character for the letter A, which haves a value of 65, so we are looking to change the data at the VRAM position 65 * 8 = 520, or 0x0208 in hexadecimal</p>

<p>Now that we know the initial position at the VRAM for the letter A, we can use the WRTVRM call to write 8-bit values from 0x0208 through 0x020f and change the default pattern:</p>

<p><img src="/assets/2022/12/Character-A-at-Screen-1-VRAM.png" alt="" /></p>

<div class="language-plaintext highlighter-rouge"><div class="highlight"><pre class="highlight"><code> ld de,LetterA	; The position for the 8 bytes of the new pattern - 00111000b
 ld hl,0x0208	; VRAM position of the first line of 8 bits for the letter A
 ld b,8		; Count to 8
 ld c,0		; from 0
    
mainloop:
 ld a,(de)	; Points A to the 1st byte stored at LetterA = "00111000b"
 call WRTVRM	; transfers 00111000b the position 0x0208 on the VRAM 
 inc de		; Increments DE for the next byte - 01101100b 
 inc hl		; Increments HL for the next position at the VRAM - 0x0209
 djnz mainloop	; decreases B and repeats loop if B!=0
; The loop ends when B decreases to 0, after the value 11000110b was 
; transferred to the address 0x020F on the VRAM 
</code></pre></div></div>

<h2 id="what-can-we-do-more-now">What can we do more now?</h2>

<p>You can try to change the pattern from the characters at the DB lines, and change the values from the characters to change other letters, or even try to change the blank space and see what happens on the screen! If anything breaks, running the command <code class="language-plaintext highlighter-rouge">screen 0 </code>fixes any issues.</p>

<p>Next article I will provide a completely new character set, and we will also change the colors of the font. See you soon!</p>]]></content><author><name>Matheus José Geraldini dos Santos</name></author><category term="Assembly" /><category term="MSX Development" /><summary type="html"><![CDATA[Knowing how to print characters on the screen using Assembly is nice, but creating your character style is the kind of thing that makes you feel awesome! At least this is how I felt after doing that, so let’s see if you also have the same satisfaction after this article.]]></summary><media:thumbnail xmlns:media="http://search.yahoo.com/mrss/" url="http://www.oddbitmachine.net/wp-content/uploads/2021/12/Screenshot-2021-12-05-2.25.39-PM.png" /><media:content medium="image" url="http://www.oddbitmachine.net/wp-content/uploads/2021/12/Screenshot-2021-12-05-2.25.39-PM.png" xmlns:media="http://search.yahoo.com/mrss/" /></entry><entry><title type="html">Working with screens and printing texts</title><link href="www.odbitmachine.net/2021/11/23/working-with-screens-and-printing-texts/" rel="alternate" type="text/html" title="Working with screens and printing texts" /><published>2021-11-23T23:26:22+11:00</published><updated>2021-11-23T23:26:22+11:00</updated><id>www.odbitmachine.net/2021/11/23/working-with-screens-and-printing-texts</id><content type="html" xml:base="www.odbitmachine.net/2021/11/23/working-with-screens-and-printing-texts/"><![CDATA[<p>In my first article, I did a little introduction about the reasons behind my decision to learn assembly for the MSX, but the most important was the first program I analyzed from MSXPen’s Hello World. It doesn’t seem much but there are a few concepts presented that are very important to notice so I’d like to return on that, such as:</p>

<ol>
  <li>Defining constants for BIOS routines, like <code class="language-plaintext highlighter-rouge">CHPUT</code></li>
  <li>The org statements which defines the memory position where the program will be allocated</li>
  <li>The Z80 <code class="language-plaintext highlighter-rouge">A</code> and <code class="language-plaintext highlighter-rouge">HL</code> registers, being capable to respectively address 8 and 16 bits data</li>
  <li>Commands such as <code class="language-plaintext highlighter-rouge">LD</code>, <code class="language-plaintext highlighter-rouge">CP</code>, <code class="language-plaintext highlighter-rouge">CALL</code>, <code class="language-plaintext highlighter-rouge">INC</code> and <code class="language-plaintext highlighter-rouge">JR</code></li>
  <li>The <code class="language-plaintext highlighter-rouge">DB</code> (Define Byte) statement</li>
  <li>And a simple loop example</li>
</ol>

<p>I’m going to avoid being too technical about the commands, statements, and parameters but at the same time, I will always add comments on each line of the code even for the most common actions because I believe that reading the code and understanding the actions through the explanations presented at the comments can be more engaging than listing all commands and trying to explain what each one does.</p>

<h2 id="the-hello-world-program-extended">The Hello World program, extended.</h2>

<p>After learning how to read the Hello World program I decide to change it and print the message on both Screen 0 and Screen 1, which the <a href="https://github.com/gseidler/The-MSX-Red-Book/blob/master/the_msx_red_book.md#screen-modes">MSX Red Book </a>describes as 40x24 and 32x24 text modes due to the number of columns and rows reach mode can present.</p>

<p>There is a very interesting detail there about the TMS9918 video display processor used by the first MSX generation: the resolution used by the processor is 256 pixels per line and 192 lines of pixels in any screen mode, but since Screen0/40x24 mode uses 6 pixels wide for 8 pixels tall characters it can only use 240 pixels per line (40 x 6 = 240 pixels). On the other hand, Screen1/32x34 text mode characters are 8x8 in size, therefore it uses the full 256 pixels line resolution to show 32 characters 8 pixels wide. Screen 2 / Graphics Mode is the most used one and allows to address each of the 256x192 pixels in blocks of 8x8 patterns, but can only apply two colors per block line, and finally Screen 3 / Multi-Color mode allows to color each “pixel”, but this pixel size is actually a block correspondent of 4x4 regular pixels.</p>

<p>But let’s not extend too long on these technicalities and go back to the new Hello World program:</p>

<div class="language-plaintext highlighter-rouge"><div class="highlight"><pre class="highlight"><code>; bios call to print a character on screen
CHPUT:      equ 0x00a2		; BIOS routine that sends to the screen the contents pointed by the A register
CHGMOD:     equ 0x005f		; BIOS routine that changes the screen mode to the value defined by A
CHGET:      equ 0x009F		; BIOS routine that waits for a key to be pressed
ERAFNK:     equ 0x00CC		; BIOS routine that sets the function keys as hidden
DSPFNK:     equ	0x00CF		; BIOS routine that sets the function keys as shown
FNKSB:      equ 0x00C9		; BIOS routine that changes the function keys between hidden and shown
            
            org 0xD000		; origin memore address

start:
            call ERAFNK		; calls the routine that hides the function keys
            call FNKSB		; calls the routine that switches the function key mode
            
            ld a,0		; loads the value 0 into A to be used by the CHGMOD call
            call CHGMOD		; calls the routine to change the screen mode
            ld hl, message1     ; Loads into HL the initial position of the message1 variable
            call mainLoop	; calls mainLoop to print the message stored at message1
            call CHGET		; waits for a key to be pressed

            ld a,1		; loads the value 1 into A to be used by the CHMOD call
            call CHGMOD		; calls the routine to change the screen mode
            ld hl,message2	; Loads into HL the initial position of the message2 variable
            call mainLoop	; calls mainLoop to print the message stored at message1
            call CHGET		; waits for a key to be pressed

            call DSPFNK		; calls the routine that shows the function keys
            call FNKSB		; calls the routine that switches the function key mode
            
mainLoop:   
            ld a, (hl)		; loads into A the content pointed by HL
            cp 0		; compares A with 0, raising the Z flag if true
            ret z		; if Z flag was set by cp, returns to the position where the routine was called
            call CHPUT		; prints the content from A on the screen
            inc hl		; advances one position of HL (next character)
            jr mainLoop		; repeates the loop
            
message1:
            db "Hello world in screen 0!",0	; message to be printed in screen 0
message2:
	    db "Hello world in screen 1!",0	; message to be printed in screen 1

	    end start
</code></pre></div></div>

<p>We have now some new BIOS routines like <code class="language-plaintext highlighter-rouge">CHGET</code> to wait for a key to be pressed so we can pause the program to see the first message printed, the trio <code class="language-plaintext highlighter-rouge">ERAFNK</code>, <code class="language-plaintext highlighter-rouge">DSPFNK</code> and <code class="language-plaintext highlighter-rouge">FNKSB</code> which hides or shows the function keys at the bottom of the screen, and the <code class="language-plaintext highlighter-rouge">CHMOD</code> which is called to change the screen mode defined by the value loaded at the <code class="language-plaintext highlighter-rouge">A</code> register. All routines values and details can be found at the <a href="http://map.grauw.nl/resources/msxbios.php">grauw.nl</a> site with this format:</p>

<div class="language-plaintext highlighter-rouge"><div class="highlight"><pre class="highlight"><code>CHGMOD
Address  : #005F
Function : Switches to given screen mode
Input    : A  - Screen mode
Registers: All
</code></pre></div></div>

<p>We can notice that when the <code class="language-plaintext highlighter-rouge">CHGMOD</code> routine is called all registers are have their data changed, so it’s important to avoid loading values at other registers before calling this routine or remember to <code class="language-plaintext highlighter-rouge">PUSH</code> the register to the stack then <code class="language-plaintext highlighter-rouge">POP</code> it again after the call. I’m going to talk about this in the next articles.</p>

<p>Apart from the screen mode changes, there aren’t many differences from the original Hello World program, and I just duplicated the lines to execute the same actions in both screen modes. You can copy and paste the program at the MSXPen site, or just open <a href="https://msxpen.com/codes/-Mk0e8e7eq2izOVqCvoK">this link</a> to see the results.</p>

<h2 id="boring-boring-lets-do-something-different">Boring boring, let’s do something different?</h2>

<p>In the next article, we will do something more interesting like changing the characters’ design and printing it on the screen at different positions. See you there!</p>]]></content><author><name>Matheus José Geraldini dos Santos</name></author><category term="Assembly" /><category term="MSX Development" /><summary type="html"><![CDATA[In my first article, I did a little introduction about the reasons behind my decision to learn assembly for the MSX, but the most important was the first program I analyzed from MSXPen’s Hello World. It doesn’t seem much but there are a few concepts presented that are very important to notice so I’d like to return on that, such as:]]></summary></entry><entry><title type="html">So I decided to create an MSX game</title><link href="www.odbitmachine.net/2021/11/19/so-i-decided-to-create-an-msx-game/" rel="alternate" type="text/html" title="So I decided to create an MSX game" /><published>2021-11-19T12:35:27+11:00</published><updated>2021-11-19T12:35:27+11:00</updated><id>www.odbitmachine.net/2021/11/19/so-i-decided-to-create-an-msx-game</id><content type="html" xml:base="www.odbitmachine.net/2021/11/19/so-i-decided-to-create-an-msx-game/"><![CDATA[<p>I always found that developing a game should be the apex of a programmer’s capability and the strongest way to prove one person’s skill and since I don’t have a background in development anything related to the subject always fell like some arcane magic and the spiritual invocation was involved in the process. But recently I decided to put my lack of confidence aside and try to develop something for the MSX machine from scratch.</p>

<p>My initial attempt was using the Fusion-C library, so I went after the official book and tried a few lines of code and could compile and execute the program on OpenMSX after a couple of nights working on the kinks of the environment.</p>

<p><img src="/assets/2021/11/IMG_20200925_174252-edited-scaled.jpg" alt="Fusion-C" /> Excellent content, but very techincal</p>

<p>As suggested by a friend from Brazil I was trying to make something that could look like Atari’s Laser Gates, and using Jannone’s TinySprite I could replicate some of the sprites from the game like the main spaceship and some enemies, but due to my lack of skills and knowledge of MSX nuts and bolts, the results weren’t so good at the time, as we can see below.</p>

<p><img src="/assets/2021/11/lasergates_running.gif" alt="" />At the time I realized that copying and pasting snippets from examples wouldn’t help me at all improve the results from my code, and my lack of knowledge about the architecture was preventing me to go forward.</p>

<p>I put the whole thing aside for some time and moved to other projects, but in the second half of 2021 the urge to learn and create something hit me again, so I went after some other books like “Learn Multiplatform assembly program with ChibiAkumas” and the “MSX technical data book” for additional details about the platform, and I finally dove heads down into the amazing and frightening work of MSX Assembly</p>

<h2 id="how-did-i-start">How did I start?</h2>

<p>Reading the books and web pages I noticed that in general it’s recommended to start the learning path by understanding the following basic subjects:</p>

<ol>
  <li>How the Z80 processor works</li>
  <li>Binary and hexadecimal calculation</li>
  <li>The complete MSX architecture</li>
  <li>The TMS9918 VDP architecture and registers</li>
  <li>Invoking ancient beings and sumoning spirits</li>
</ol>

<p>As a good odd type of person, I simply decided to go straight to the assembly code, knowing that I would need to reach out for more information about basic subjects when needed, moving ahead with just enough knowledge to make something run. This is a risky action but I’m not afraid to scratch everything and start from zero again if I get stuck, and no harm could happen from this apart from wasting my available time in the process. To be honest, this method is not the most recommended and can be really frustrating, but advancing any step feels like a huge achievement.</p>

<p>It’s amazing the number of available resources today to develop for the MSX platform if you search the net a little, from programming straight on the original hardware to Web-based emulators with quick ASM compiling. I tried a few of the options available but in the end decide to start my learning path using the <a href="http://www.msxpen.com">MSXPen</a> site, since it provides a very straightforward process to execute the ASM program without requiring moving files around or running emulators in my local machine.</p>

<h2 id="explaining-is-the-best-way-to-learn">Explaining is the best way to learn</h2>

<p>Cutting to the chase, I want to explain the things I learned in the most simplified way, which will help me to absorb better the information and also help anyone interested to discover how to program in Assembly for the MSX, and eventually have something to show at the end of this path.</p>

<p>In my articles, I will use MSXPen as the main tool for the activities but eventually, I might include other tools. My goal is to explain and provide resources to anyone to replicate my actions without too much hassle.</p>

<p>The MSXPen site comes with a simple <a href="https://msxpen.com/?gist=cd0adc762c47bba4265f1bb25528f928"> “Hello world?”</a> code, so my first step was to comment on all lines to understand how the program works:</p>

<figure class="highlight"><pre><code class="language-asm" data-lang="asm">; bios call to print a character on screen
CHPUT:      equ 0x00a2

            ; the address of our program
            org 0xD000

start:
            ld hl, message
mainLoop:   ld a, (hl)
            cp 0
            ret z
            call CHPUT
            inc hl
            jr mainLoop

message:
            db "Hello world!",0

            ; use the label "start" as the entry point
            end start</code></pre></figure>

<p>The program starts by defining a constant for the <code class="language-plaintext highlighter-rouge">CHPUT</code> call to a function from the BIOS, which is responsible to write characters on the text-based screen. For a beginner, this is somehow hard to completely grasp what it’s happening here but imagine that this is like hiring a person to write letters on a sign in your behalf, so you don’t need to worry about mixing paint or knowing which is the best brush or pencil to use, you just need to tell the professional what letter you want to print and they take care of the rest. I will come back in a later article explaining what the 0x00a2 hexadecimal address means and how to work with other BIOS calls, but for now, it’s all we need to know.</p>

<p>The <code class="language-plaintext highlighter-rouge">org</code> statement tells the system where to allocate the program in the memory. The MSX memory space and slots definition is really interesting and important to understand, but right now we just want to see the message on the screen so setting the code origin to <code class="language-plaintext highlighter-rouge">0xD000</code> works perfectly and it’s all we are looking for.</p>

<p>MSXPen compiler wraps the code with the <code class="language-plaintext highlighter-rouge">start:</code> and <code class="language-plaintext highlighter-rouge">end start</code> statements, so it’s nice to keep it this way for now. We see that the first actual command is <code class="language-plaintext highlighter-rouge">ld hl, message</code>, which basically means <em>“load into the register HL the variable message”</em>, but this doesn’t mean that the whole content from the variable will be loaded into the register and we will see soon how assembly works around that.</p>

<p>Next, we have the <code class="language-plaintext highlighter-rouge">mainLoop:</code> section and there is a very good reason for creating it there. The sections we define in the code didn’t end up in the final program but are used as a pointer for the compiler so it knows where in the memory the program might need to jump eventually. The first command at mainLoop is <code class="language-plaintext highlighter-rouge">ld a, (hl)</code>, which means “<em>load in register A the position from the memory pointed by HL</em>”, which is exactly the first character of the variable <code class="language-plaintext highlighter-rouge">message</code>. But why not go ahead and load <code class="language-plaintext highlighter-rouge">message</code> into <code class="language-plaintext highlighter-rouge">A</code> instead? Simply, the system will need to go through all characters from the variable since it cannot load the whole data into A (an 8 bit register) and ask <code class="language-plaintext highlighter-rouge">CHPUT</code> to print that at the screen.</p>

<p>The<code class="language-plaintext highlighter-rouge"> cp 0</code> compares the content from register A with zero, and raises a special flag named Z if true. This is how I create an IF-like statement in the assembly code, transferring the code execution to another position when needed. Then the <code class="language-plaintext highlighter-rouge">ret z</code> statement means “return to the part of the program that called this routine, and if there is none return to BASIC”. So we can figure out that when the HL register points to the value 0, the routine will finish and the program will end, returning the system control back to BASIC, DOS, or whatever was running before the program was executed.</p>

<p>The following command is <code class="language-plaintext highlighter-rouge">call CHPUT</code>, which invokes the BIOS routine stored at the position 0x00a2 of the Main ROM responsible to print things at the display. This is the definition of this routine found at the <a href="http://map.grauw.nl/resources/msxbios.php">grauw.nl</a> site:</p>

<div class="language-plaintext highlighter-rouge"><div class="highlight"><pre class="highlight"><code>CHPUT
Address  : #00A2
Function : Displays one character
Input    : A  - ASCII code of character to display
</code></pre></div></div>

<p>The function basically gets the value from register A and prints it at the screen. Where it will printed is not a concern for this routine, so the character will be displayed at the current cursos position and then it will move the cursor to the next column or line at the screen. Simply like that.</p>

<p>Now we have some important action at the next line of code: inc hl. This will increase the value of <code class="language-plaintext highlighter-rouge">HL</code>, meaning that now the register points to the second character of the string defined by the message variable. This is how the code goes through all the characters defined by the <code class="language-plaintext highlighter-rouge">DB</code> statement and calls <code class="language-plaintext highlighter-rouge">CHPUT</code> to all of them until 0 is loaded into <code class="language-plaintext highlighter-rouge">HL</code>, which causes the <code class="language-plaintext highlighter-rouge">CP 0</code> command to raise the <code class="language-plaintext highlighter-rouge">Z</code> flag and return the execution back to BASIC or wherever the program was executed.</p>

<p>Then finally we have the jr mainLoop, which will constantly return the code execution back to the memory position defined by the mainLoop label until something else interrupts the loop, in this case the <code class="language-plaintext highlighter-rouge">CP 0 / RET Z</code> duo.</p>

<p>The end of the code contains the message section with the DB (Define Byte) with the <code class="language-plaintext highlighter-rouge">"Hello world!"</code> message, followed by the 0 value that ends the loop when <code class="language-plaintext highlighter-rouge">CP 0 </code>is invoked.</p>

<p>Is all this too confusing? May be a little, but messing around with the Hello world code we can learn the basics of MSX assembly and do some crazy stuff like removing the <code class="language-plaintext highlighter-rouge">CP 0</code> and <code class="language-plaintext highlighter-rouge">RET Z</code> statements just to see the MSX system going nuts, printing garbage and beeping like crazy until the whole system crashed. It’s really fun, you should try that!</p>

<h2 id="thats-all-folks">That’s all, folks!</h2>

<p>I will stop right here for now and come back with more explained codes in the next articles, but I will appreciate any suggestions and recommendations for the next ones. Thanks and happy learning!</p>]]></content><author><name>Matheus José Geraldini dos Santos</name></author><category term="Assembly" /><category term="MSX Development" /><summary type="html"><![CDATA[I always found that developing a game should be the apex of a programmer’s capability and the strongest way to prove one person’s skill and since I don’t have a background in development anything related to the subject always fell like some arcane magic and the spiritual invocation was involved in the process. But recently I decided to put my lack of confidence aside and try to develop something for the MSX machine from scratch.]]></summary></entry></feed>